 |
Get the bestG A R L I Cfrom Snakeroot Organic Farm
|
 |
Want to buy garlic? Go here.
Originating in central Asia, and spreading east and west via the spice and silk trade routes during the Middle Ages, today garlic is used worldwide. Of the several types of garlic, the soft-neck artichoke types are the ones most often found in grocery stores. It has a higher yield and more domesticated flavor. This is also the type that can be woven into braids.
At Snakeroot Organic Farm we chose to grow a different garlic type called Rocambole, and the variety is Red German. Rocambole garlic is a stiff-neck type that cannot be braided. The Red German variety has a purplish cast to many of the bulbs and excellent half-wild flavor.
STORAGE
Garlic should never be stored in the refrigerator, as the typical refrigerator humidity and temperature mimic springtime soil conditions, and garlic responds by beginning to grow. The ideal storage temperature for garlic is between 60°-70°F, or at room temperature in a well-ventilated container. Good garlic should keep for months. Bulbs which show softening in any of the cloves should be used immediately or discarded.
USING GARLIC
To get the best flavor from your garlic, add it to cooking during the last 10 minutes before serving.
Garlic may be dried in the home by mincing the cloves in a food processor and spreading them out in a warm oven or home dehydrator until dry. These garlic crumbles are excellent in stir fries or sauces or sprinkled on buttered bread and placed in the oven to make a delicious garlic bread.
CHOOSING GARLIC SEED
Any garlic can be planted with some measure of success, but since all garlic propagates vegetatively (instead of from seed), starting with a garlic that has been acclimated for several generations to the area where it is to be grown gives the garlic grower an additional advantage.
Furthermore, since most garlic sold for culinary purposes is not identified as to variety, the garlic grower has no way of assuring what kind of garlic is being purchased. As with many vegetables produced in industrial agriculture, yield-per-acre is given precedence over flavor.
For these two reasons, it is always best to purchase locally grown garlic for your garlic growing projects. That way you will know it has been acclimated to this area and you can ask about the variety characteristics.
PLANTING GARLIC
There are two ways to plant garlic: planting cloves or planting bulbils. (For an explanation of bulbils, see “Harvesting Garlic”, below.) When planting either cloves or bulbils, planting is done in mid October in central Maine, or about four weeks before the ground freezes regularly. The idea is to plant early enough for the roots to begin to form yet not so early that the top growth will emerge. Any top growth will be winter-killed and is thus a waste of the plants energy. Add compost to the soil well before planting, as this will be the last time you fertilize the ground before harvesting your garlic.
A heavy 4-6 inch layer of mulch of straw or pine needles or shredded leaves is added after planting. Each of these mulches allow the garlic spears to emerge unhindered in the spring. (Unshredded leaves will work, but must be removed before early spring top growth starts or else the matted leaves will prevent most of the garlic spears from emerging properly.) The purpose of the mulch is to even out soil temperatures, protect the garlic from too hard a winter freeze, and prevent heaving of the garlic out of the ground during repeated thaw-freeze cycles. Later in the summer, the mulch acts to retain soil moisture needed for the bulbs to size up.
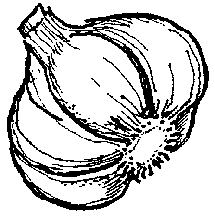
Planting cloves: The most common planting method is to plant garlic cloves. Break apart a garlic bulb into its cloves. Notice which end of the clove is attached to the bulb; this is the root end, usually the most blunt or least pointed end of the clove. It is important to plant each clove with the root end down. Break the cloves apart in the house shortly before planting time, then head out to the garden with a bucket full of cloves to plant. Cloves are planted by pushing them into the soil about two inches deep, about six inches apart. In general, the larger the clove you plant, the larger the bulb of garlic you will get.
Planting bulbils: There are two ways to plant bulbils, depending upon what crop you want. Some people are looking for a spring harvest of garlic grass, so they plant their bulbils very close together in the fall. In spring, the emerging shoots are cut off and added to salads, sauces or omelets. Of course this is the end of the harvest year for such a planting.
On the other hand, if you are looking to harvest garlic from your bulbil plantings, plant them about one to two inches apart in rows about two inches apart. Push them underground about an inch, and cover with a light mulch. In July, harvest the garlic rounds that result and either use them like garlic if they are large enough, or re-plant them in the fall using the instructions above for planting garlic cloves. The following year, these rounds will produce regular garlic bulbs. The size of rounds varies from 3/8 inch to 1 1/2 inches and look very much like a small onion.
HARVESTING GARLIC
If you planted garlic cloves, the leaves on the stalk will begin to die (turn yellow) in late July. Harvesting is done when there are four or five green leaves left on the plant, usually early August. Delaying harvest beyond this point makes the garlic hard to clean because the outer wrapper leaves have started to decay. Also, late harvested garlic usually does not store as well.
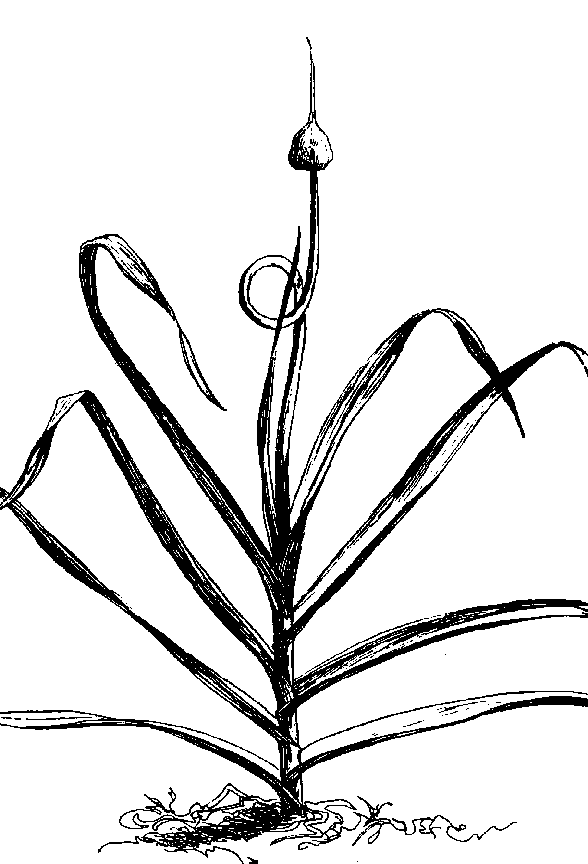
Scapes are the curly-cue tops of the garlic plant that appear in early July. If left to mature, they will straighten up and form heads of from twelve to twenty chickpea-sized mini-bulbs called bulbils. These bulbils may be used as is like miniature garlic cloves, or may be saved to plant in the fall.
Scapes may be cut off as soon as they form to use as garlic scallions while you are waiting for your garlic bulbs to mature. In China, these are a delicacy called tsuan-tie (swan-tie), and of course are available only a few weeks of the year. Many folks chop and freese these for later use.
There are two schools of thought about harvesting the scapes from your garlic plants. One says that since the plants energy will be divided between enlarging the underground bulbs and growing the aerial bulbils, by cutting off the scapes before the bulbils form more of the plants energy goes into the garlic bulbs. The other school of thought suggests that by essentially cutting off half the plant during its growth you shock the plant which negates any beneficial effects. At Snakeroot Organic Farm, we do some of our garlic each way, partly because we sell the scapes at farmers markets during July. We have noticed little if any affect this has on the bulb size, and believe many other factors such as soil fertility and moisture, planting clove size. and weather have greater affect on bulb size.
If you planted bulbils, they will not form any stalks. Instead they will have several grass-like leaves up to a foot long, which will die back in July. This is the time to harvest the rounds! What you will find is marble- to golf-ball-sized rounds that resemble small onions in that they are not divided into cloves. These rounds may be eaten like garlic cloves or saved to plant again in the fall. If planted, they will then give you regular garlic bulbs the following year.
FOR MORE INFORMATION
Growing Great Garlic by Ron Engeland is a good book on all aspects of the history and growing of garlic.
If you would like to discuss any aspect of garlic, feel free to write, call, email, or stop by the farmers market anytime.
GARLIC AVAILABILITY
Snakeroot Organic Farm offers garlic bulbs and bulbils from late June until December.
Garlic scapes (the curly tops) are available from mid June to mid July only.
