USING TREE TAGS
You will forget which tree is which years after you’ve got a few planted, so it’s wise to put tags on them as soon as you plant or graft them to keep track. Even if you don’t know the actual variety, you can always just number them to keep track, so your records can say that “Tree #5 bore heavily in ‘19”.
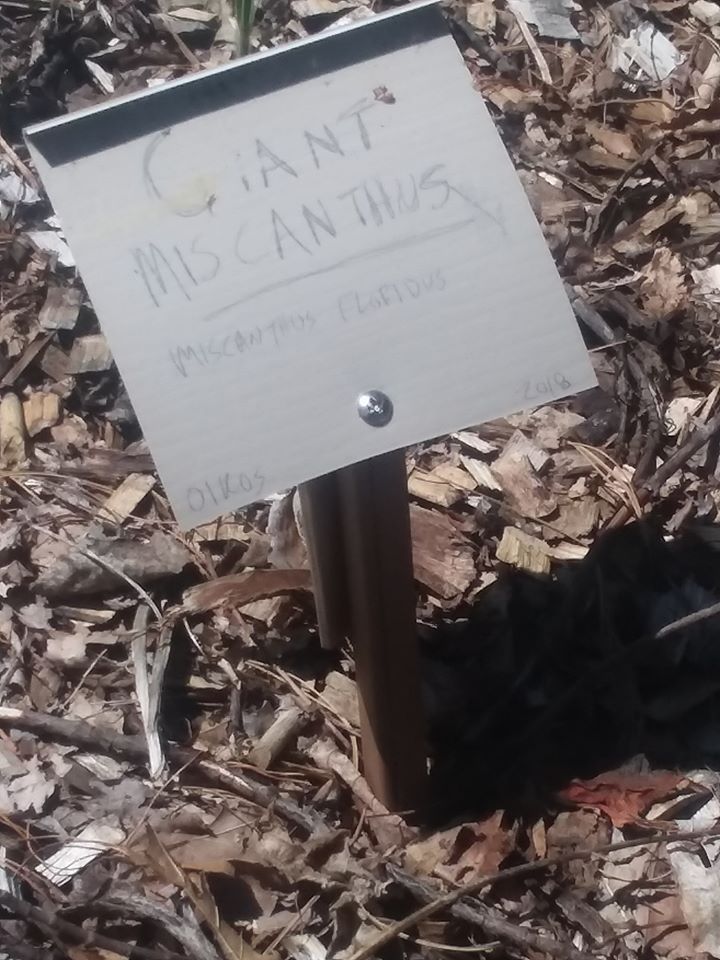
Some folks like to label their trees arboretum-fashion with a stake in the ground and a label attached to the stake. Very nice ones can be easily made, as the photo to the right shows. Edgewood Nursery’s Aaron Parker made this original design of a “permanent” stake-style plant label. The post is a ripped down scrap of composite decking with a 45° cut on both ends. The sign—a piece of recycled vinyl house siding—is held on with a ½” stainless truss head screw and written on with pencil.
However, we find that stake-labels get in the way of working around the tree and applying mulch. What we are covering here, for the most part, are tags that are hung on a branch of the tree; hence you will see in the tag-collection photo below that all of the tags have a hole at one end.
Here are some options for more or less permanent tree tags. Not just a year or two, but five, ten, twenty years or more.
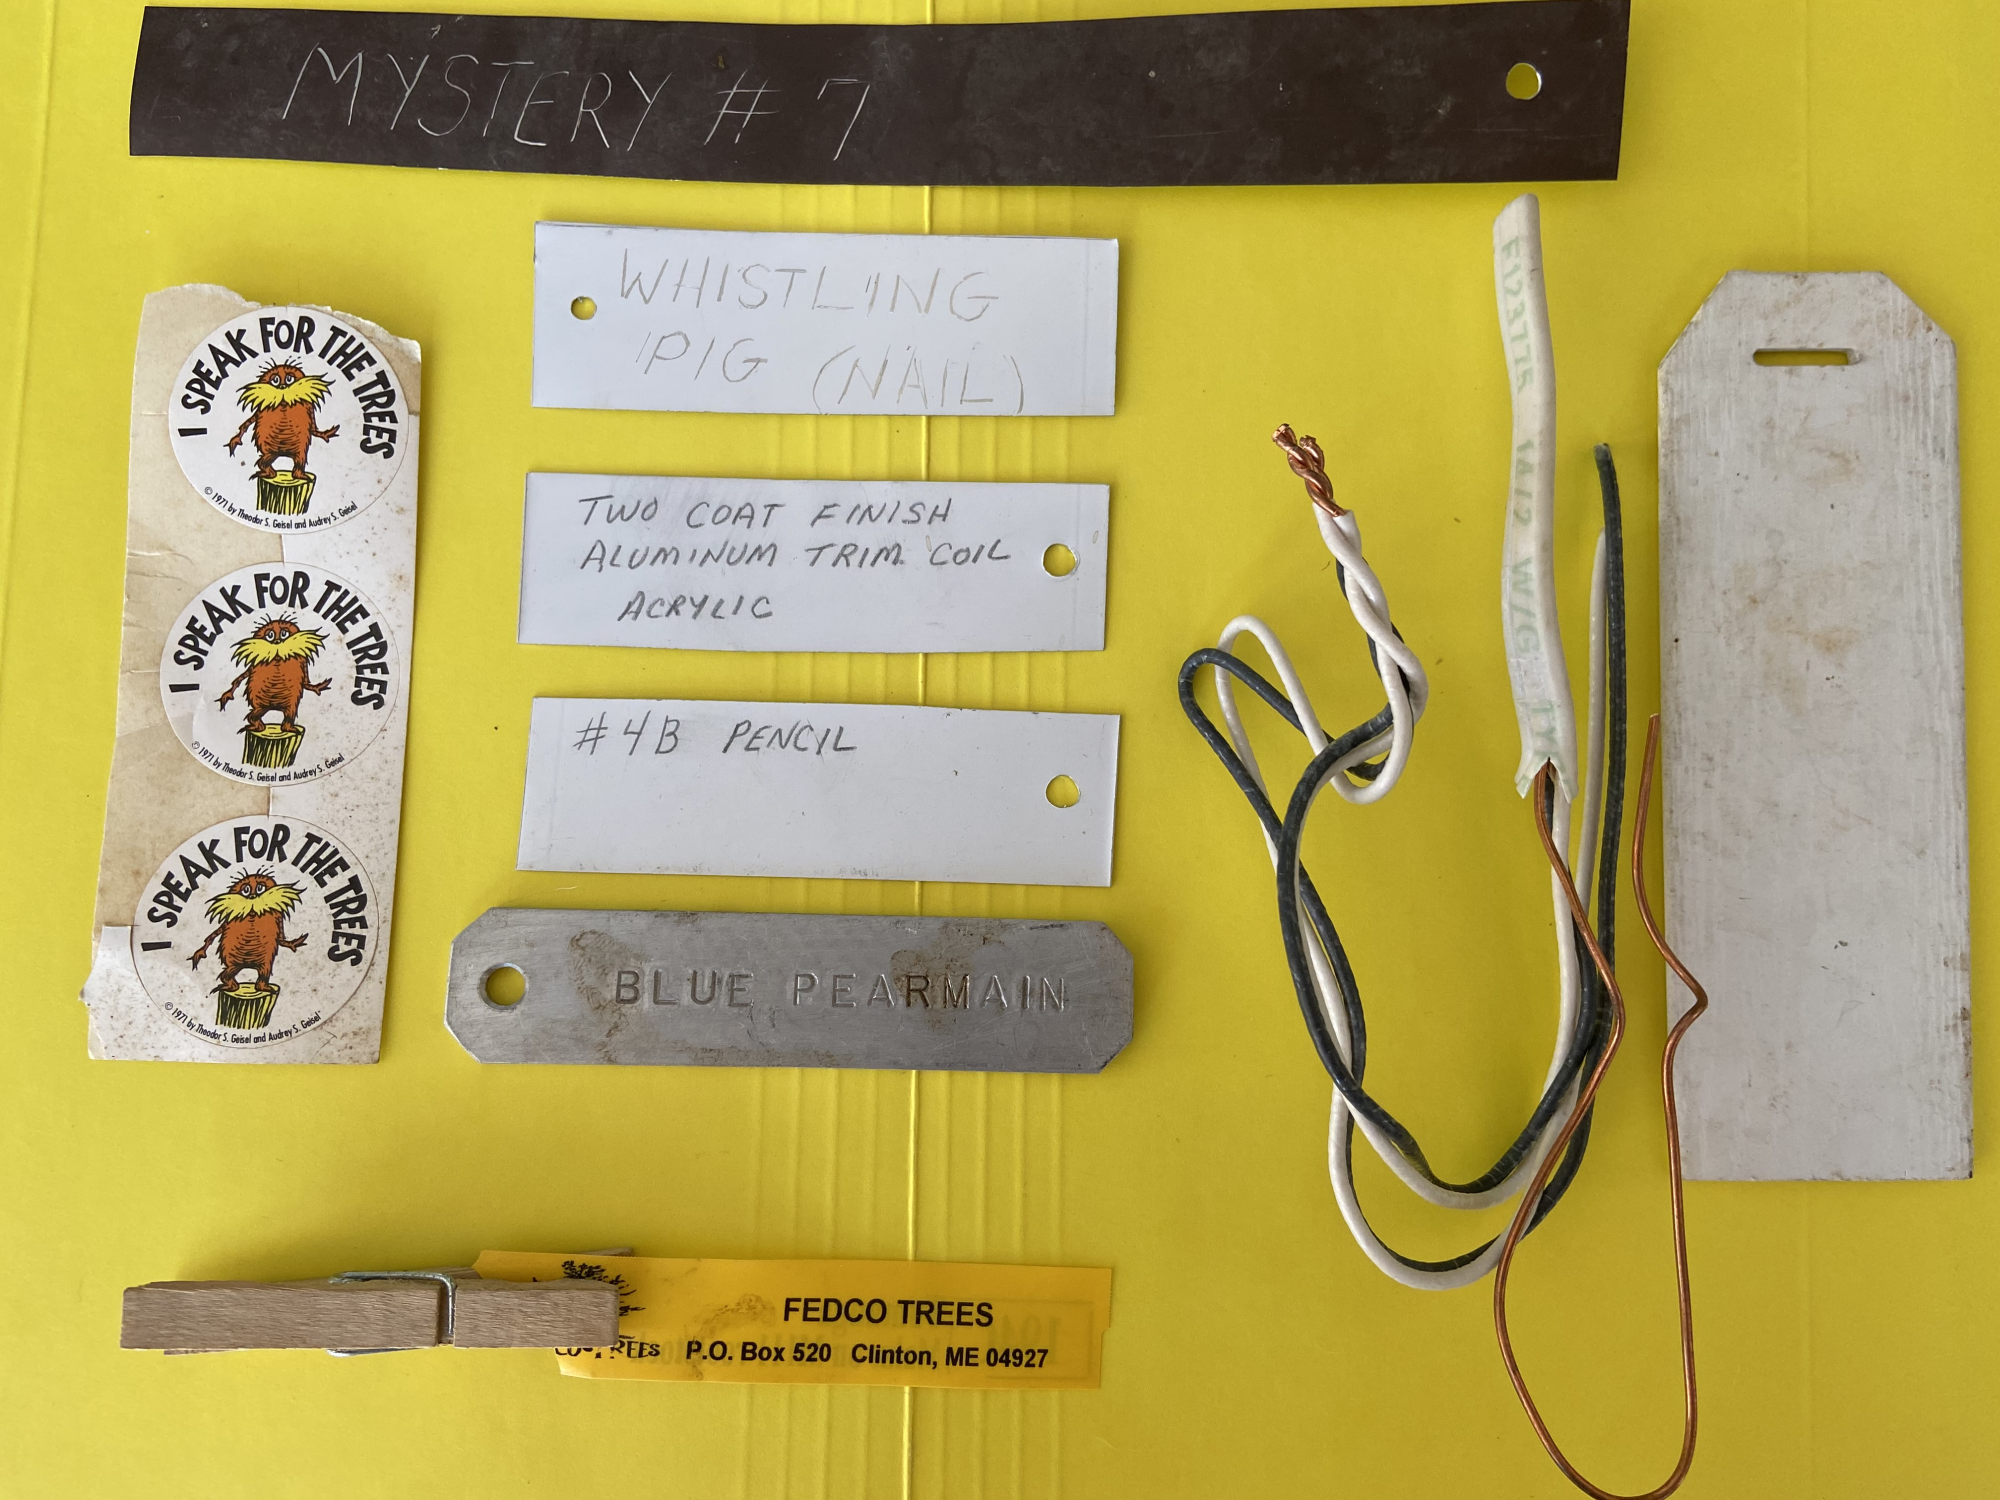
CHOOSE YOUR TAG.
Those flimsy vinyl strips (in clothespin, above) that came with your nursery grown tree, will actually last if you keep them out of the sunlight. Some growers will bury these next to the tree as insurance in case you lose a label topside. Left on the tree as they arrived, however, they will often not last a year. Relying on them to still be there for years to come is the surest way of losing track of your tree varieties.
Coated aluminum rolls or sheets can be used, if either etched (perhaps with a ballpoint pen “stylus”) or written on in PENCIL.
Plain Aluminum Flashing is also easy to find, just remember that markings from a number 2 PENCIL will long outlast a “permanent” marker such as a Sharpie or Marks-A-Lot.
You can get extra fancy and buy a metal stamping kit and some ⅛ inch thick aluminum stock for your tag. This is probably the most durable tag of the lot.
Standard household Vinyl Siding may be the easiest to scrounge and simplest to use. You may find various thicknesses of this material depending on it’s application. A small, 1″ x 3” piece will often suffice and a hole drilled in a corner will allow it to be hung on a branch with a wire. Again, the Number 2 Pencil comes into play here, just don’t smudge it. Organic Growers Supply once sold these but now suggests you can make your own.
At one time thin aluminum tags with thin aluminum wires were quite popular. While easy to etch with a ballpoint pen, if not attached to the tree in a manner that does not allow fluttering in the wind, these wires wear out in a few years and the tags end up “somewhere else”.
ATTACHING THE TAGS.
Wires can usually be scavenged from any construction site or possibly a friend. The copper wire can be stripped of its covering if so desired, it’s a pleasure to use and holds up well. Just remember that if you are using a metal tag and a metal wire, if two dissimilar metals are touching then corrosion may eat away at your tag until the wind finally takes it away. Two metals touching can be avoided by leaving the wire insulation in place, or by using a vinyl tag.
There is really no twine, string, or cord that works as well as a stout wire about the diameter of raw spaghetti. Nylon rope will photo-degrade in a year or two, as will plastic bailing twine. Copper or aluminum wires work well, but cost more unless you can locate enough short pieces for all your labels.
When attaching the tag to the tree, it is handy to have the wire both secure and detachable, so that as the branch holding the label grows bigger over the years, the wire can be re-positioned to prevent strangulation. Having a wire bent so the ends hold together without being twisted together means your wire might last as long as your tag.
Since you probably won’t remember over time which variety is which, labeling can be a path to tree sanity.
DRAW YOURSELF A MAP.
Try making a very detailed map as a backup, in the case that the trees don’t speak for themselves. Here is a map that Snakeroot Organic Farm has of one of their fruit tree growing areas. It is the culmination of several years of cruder efforts.
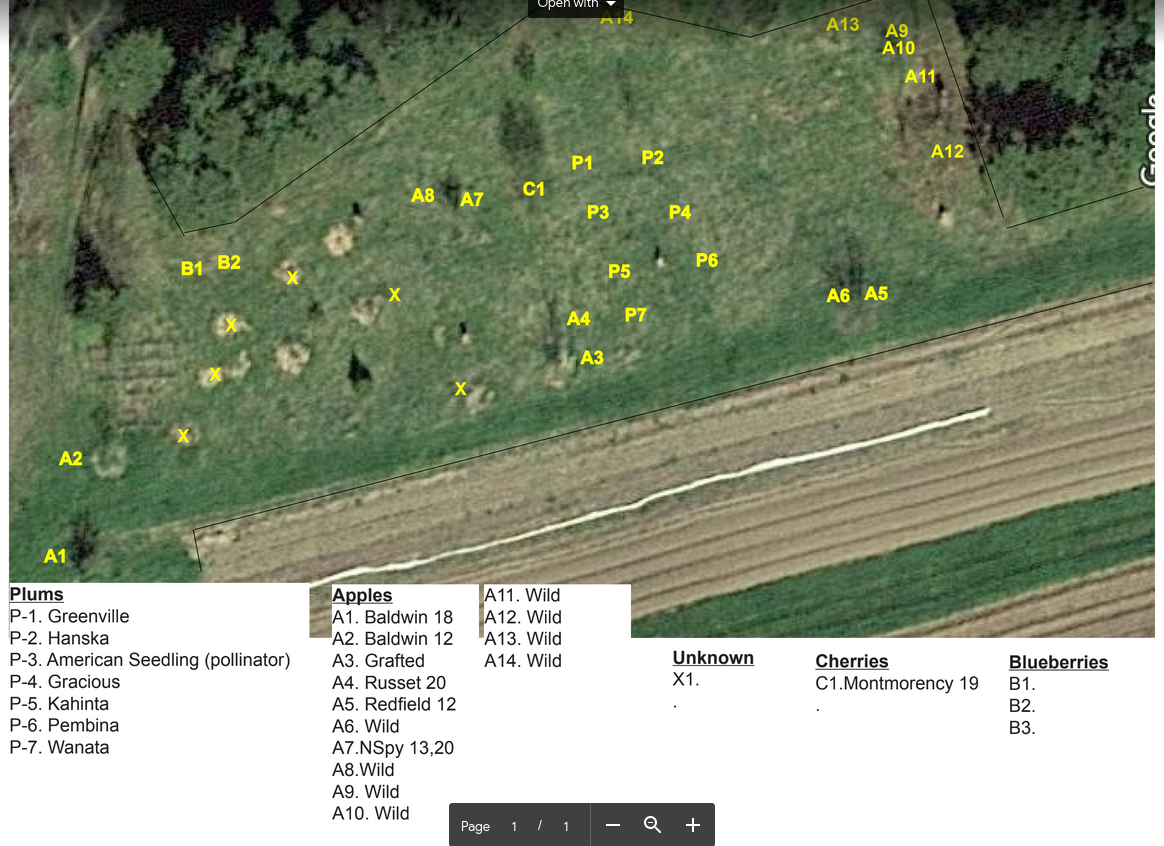
Snakeroot’s Tom Roberts says, “This map of our “New Orchard” was created using as a background a screen grab of a Google Maps satellite view of our farm. This allowed accurate positioning of the tree codes which were then referenced in the key at the bottom. The map is stored on my Google Drive and in my DropBox to avoid losing it if my hard drive dies. Assigning and positioning the tree codes did require a few back-and-forth field outings as the map was being made, but the result is so much nicer and more accurate than sketches done in the past. Most of these trees also have tags on them.”