Growing Garlic Rounds
from Bulbils
by Tom Roberts, July, 2009
Click on photos to enlarge.
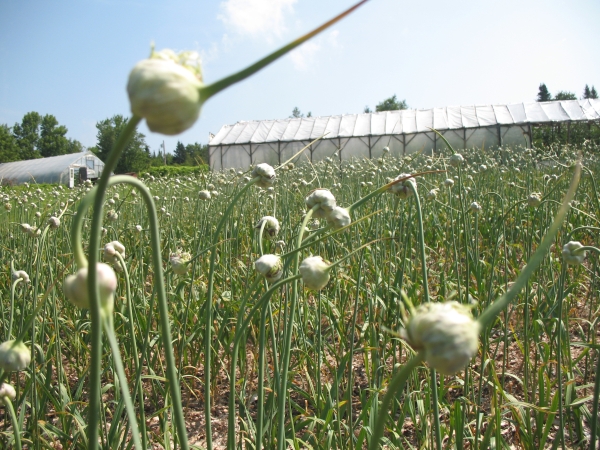 For fifteen years I have been planting most of my garlic crop with rounds I have grown from bulbils. This saves having to hold back sellable garlic for seed, and many rounds can be grown in a relatively small area. Additionally, while they are growing the bulbils have never touched the soil, thus breaking links to carrying over soil borne diseases to the next crop. The photos below were taken in July, 2009, just prior to harvesting the rounds. The photo at right shows the bulbil clusters at the top of the garlic plants. We harvest all of our smallest scapes to sell fresh at market, allowing only the largest to continue on to form bulbils. For fifteen years I have been planting most of my garlic crop with rounds I have grown from bulbils. This saves having to hold back sellable garlic for seed, and many rounds can be grown in a relatively small area. Additionally, while they are growing the bulbils have never touched the soil, thus breaking links to carrying over soil borne diseases to the next crop. The photos below were taken in July, 2009, just prior to harvesting the rounds. The photo at right shows the bulbil clusters at the top of the garlic plants. We harvest all of our smallest scapes to sell fresh at market, allowing only the largest to continue on to form bulbils.
Planting 8-Oct-08.
 Several Maine garlic growers have told me that when they planted bulbils all they get is tiny bulbs of garlic, and no rounds at all. I am at a loss to explain why this happens, for it has never happened to me. I do get a percentage of bulbils going straight to small bulbs, but nowhere near all of them. So in 2008, I decided to try to see if planting date affected the percentage of bulbils that skipped the round stage and made little bulbs instead. The dates I chose were: 8-Oct-08, 20-Oct-08, and 11-Nov-08. The final date was at just about ground freeze-up, and the first date turned out to be approximately a month before ground freeze-up. Several Maine garlic growers have told me that when they planted bulbils all they get is tiny bulbs of garlic, and no rounds at all. I am at a loss to explain why this happens, for it has never happened to me. I do get a percentage of bulbils going straight to small bulbs, but nowhere near all of them. So in 2008, I decided to try to see if planting date affected the percentage of bulbils that skipped the round stage and made little bulbs instead. The dates I chose were: 8-Oct-08, 20-Oct-08, and 11-Nov-08. The final date was at just about ground freeze-up, and the first date turned out to be approximately a month before ground freeze-up.
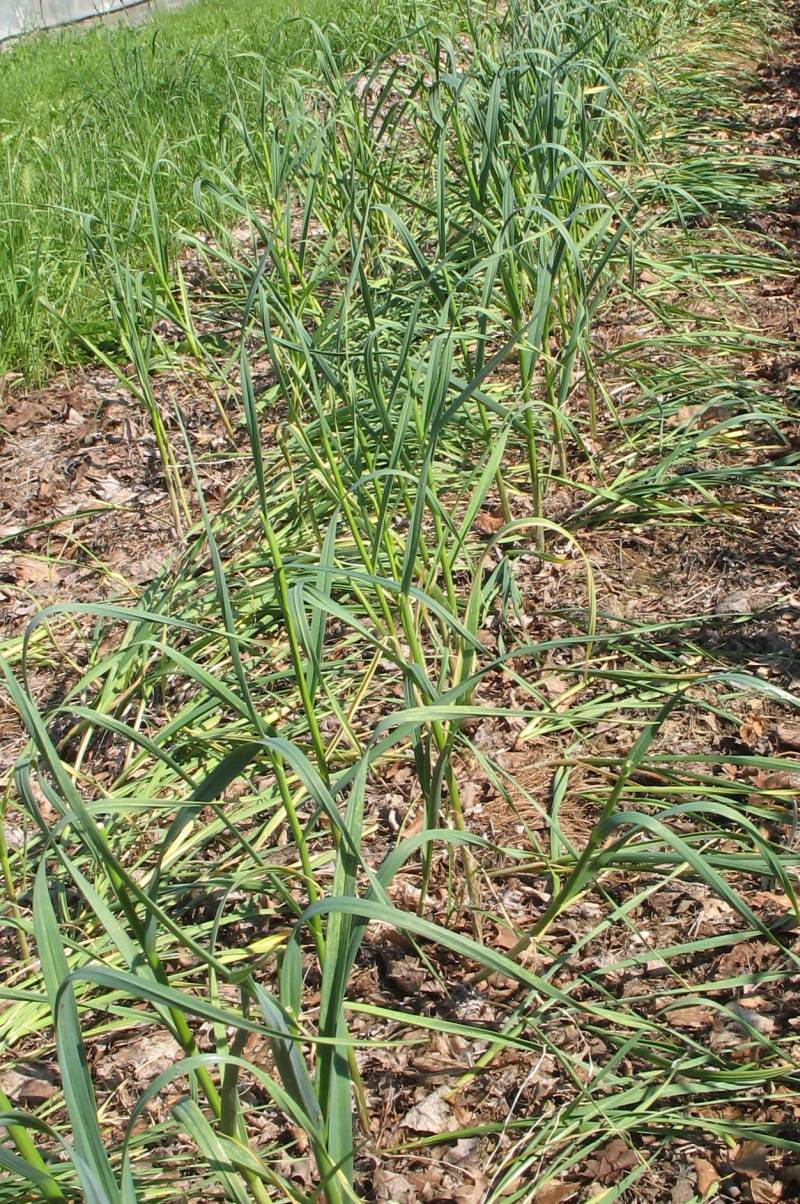
The photo at the right is of the 8-Oct-08 planting, taken in mid July of 2009 immediately prior to harvest. The bulbils were planted in two rows on this bed. You can see the many rounds with their tops laying down similar to how onions “go down” when they are ready to harvest. There are a little over half that have gone down, and the others are standing upright since they have skipped the round stage and gone straight to little bulbs, complete with scapes. (In these shots all the scapes have already been harvested and sold at farmers’ market.) At the time the photos were taken, all of the rounds had gone down, yet still had green tops. I have found that this is the easiest time to harvest them. In two more weeks the tops of the rounds would have dried and weakened greatly, making harvesting by pulling them much more difficult.
Planting 20-Oct-08.
Another section of the same bed, this one planted on 20-Oct-08. You can see that there is a far higher percentage of bulbils that grew rounds instead of little bulbs compared to the 8-Oct planting in the previous photo. The detail view of rounds laying down versus bulbs standing up is more evident when the photo is viewed enlarged (click). This planting looks to have produced around eighty percent rounds.
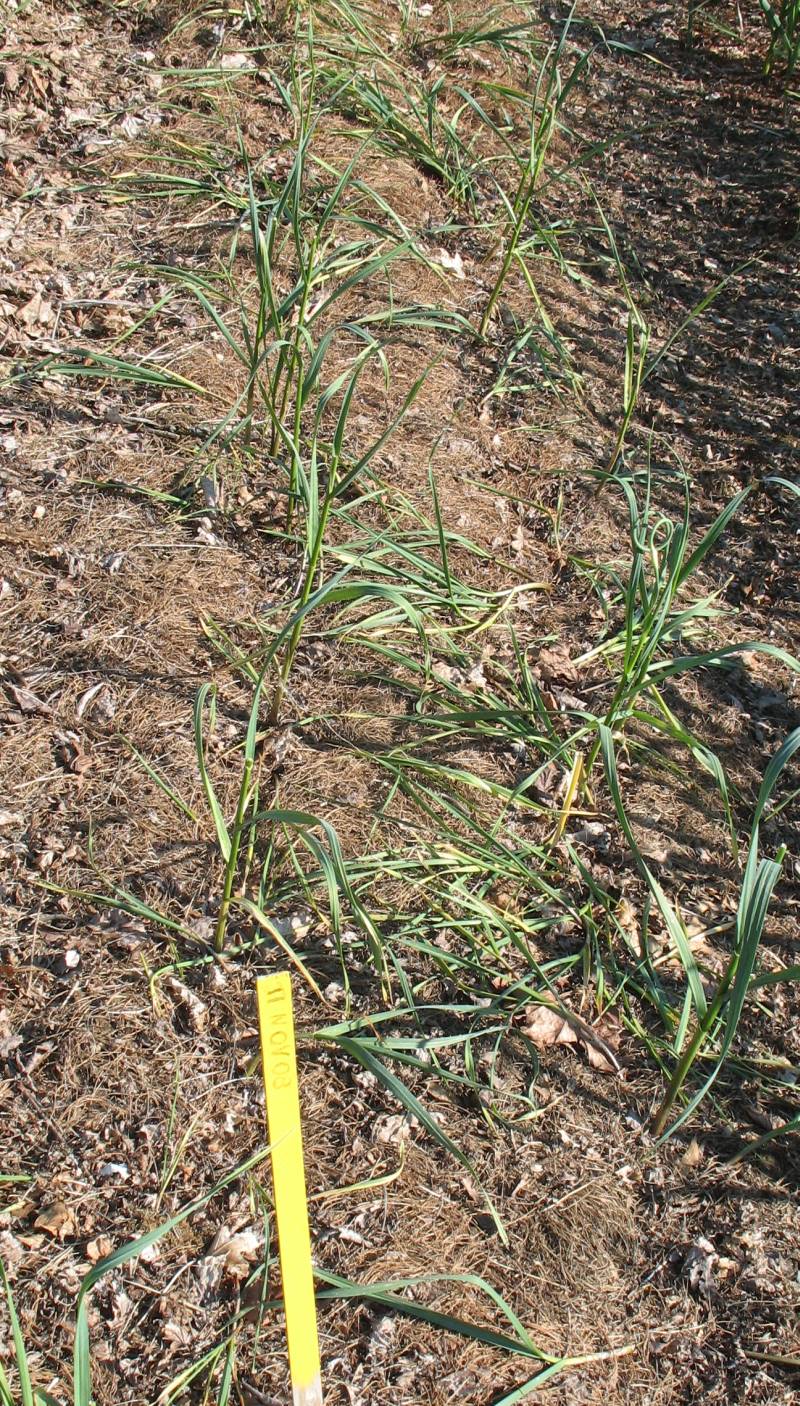 Planting 11-Nov-08. Planting 11-Nov-08.
The last planting was on 11-Nov-08, and was almost the last day they could have been planted before the ground froze. Here we see the percentage seems to have gone back to half rounds and half small bulbs. However, the total number of germinating bulbils was far smaller, resulting in an overall sparser stand.
Conclusion.
The result of this trial tells me that mid October is the preferable date to plant bulbils for producing rounds, resulting in not only a higher rate of germination and a thicker stand, but also a far more favorable ratio of rounds to little bulbs.
Tips:
- Since rounds and little bulbs are often growing with their roots entwined, we have found it more efficient to harvest the entire planting at one time, even though the little bulbs are not quite ready. We sell the largest of these immediately at the farmers’ market. The larger ones range in size from a quarter to fifty cent piece and comprise about fifteen percent of weight of the total little bulb harvest.
- When harvesting rounds, grabbing the top near the base and wiggling it from side to side often releases the roots of a stubborn round better than a straight tug will.
- In the past we have planted bulbils by making a shallow furrow with a hoe, dribbling the bulbils in, then covering the furrow and mulching. We have discovered that covering with soil isn’t really necessary, so after the bulbils are placed in the furrow, they are simply mulched. This results in their being easier to pull at harvest time.
- For mulch, we use three inches of shredded leaves or five inches of pine needles on the beds, each of which allows the garlic shoots to easily penetrate in spring. In the aisles between beds, we use whole leaves to aid in weed suppression.
|
