TIMING YOUR HARVEST ·•|•· TRIAGE YOUR RETURNS ·•|•· HARVEST AND SHIPPING CONTAINERS
WASHING & BUNCHING ·•|•· BUNCHING MATERIALS ·•|•· SORTING AND BAGGING
CHOOSING AND BUILDING THE SITE ·•|•·
INTRO.
Transforming your freshly harvested produce into a beautiful display at market requires a bit more thought and effort than simply loading what you’ve picked into your market van. Over the years we have learned, sometimes by listening to others and sometimes through trial and error, how and when to harvest our market produce, and how best to prep it for market. Each type of produce has its own requirements for ideal harvest time and preparation method. Some are simple (the “hardware”) and some require great care (the “perishables”), and some fall in between. Some require washing, some need to stay dry; some require refrigeration, some deteriorate under refrigeration. The complex requirements of each of the living organisms whose proper care we had to learn from seeding to harvest, continues into the preparation area and onto the display stand at market.
TIMING YOUR HARVEST ·•|•·
Timing your harvest begins with timing your plantings. About half our crops require succession plantings—some just twice, others every week or ten days—to ensure a continuous harvest without gaps in production.
Each veggie has its own criteria for optimum harvest time, both relative to it’s maturity and relative to when it is to be sent to market. Many of our crops are put on a two-day harvest schedule once production comes into full swing. Cukes & pickles, summer squash & zucchini, peas & beans all are harvested on staggered two-day schedules. This ensures that they are picked regularly before growing too large and past their prime.
Timing your harvests can be the most challenging part of getting veggies to market in prime condition. Each type of veggie requires it’s own harvest schedule. Your harvest schedule for each veggie will depend on the markets that you have, the growing times of each crop, and the weather. In general, we plan our harvesting around our anticipated market needs. On each market day we first we triage our cooler and then make a list of how much of what is needed for each market day.
Frequency of harvest depends on the veggie.
Some crops need constant harvesting: beans, peas, summer squashes and cukes will keep producing if they are picked on a regular schedule, but will slow production way down if fruits begin to mature seeds by being left on the plant. Better that they are picked ahead and keep fresh for a few days in a cooler or cool storage area than to let over-ripen on the plant. For these frequently picked crops it is better to pick all that is ready and risk throwing some away than it is to leave it unpicked to grow into poor quality veggies and have the plants stop production. In other words, for many veggies, it is important to harvest all that is ready regardless of your ability to market it.
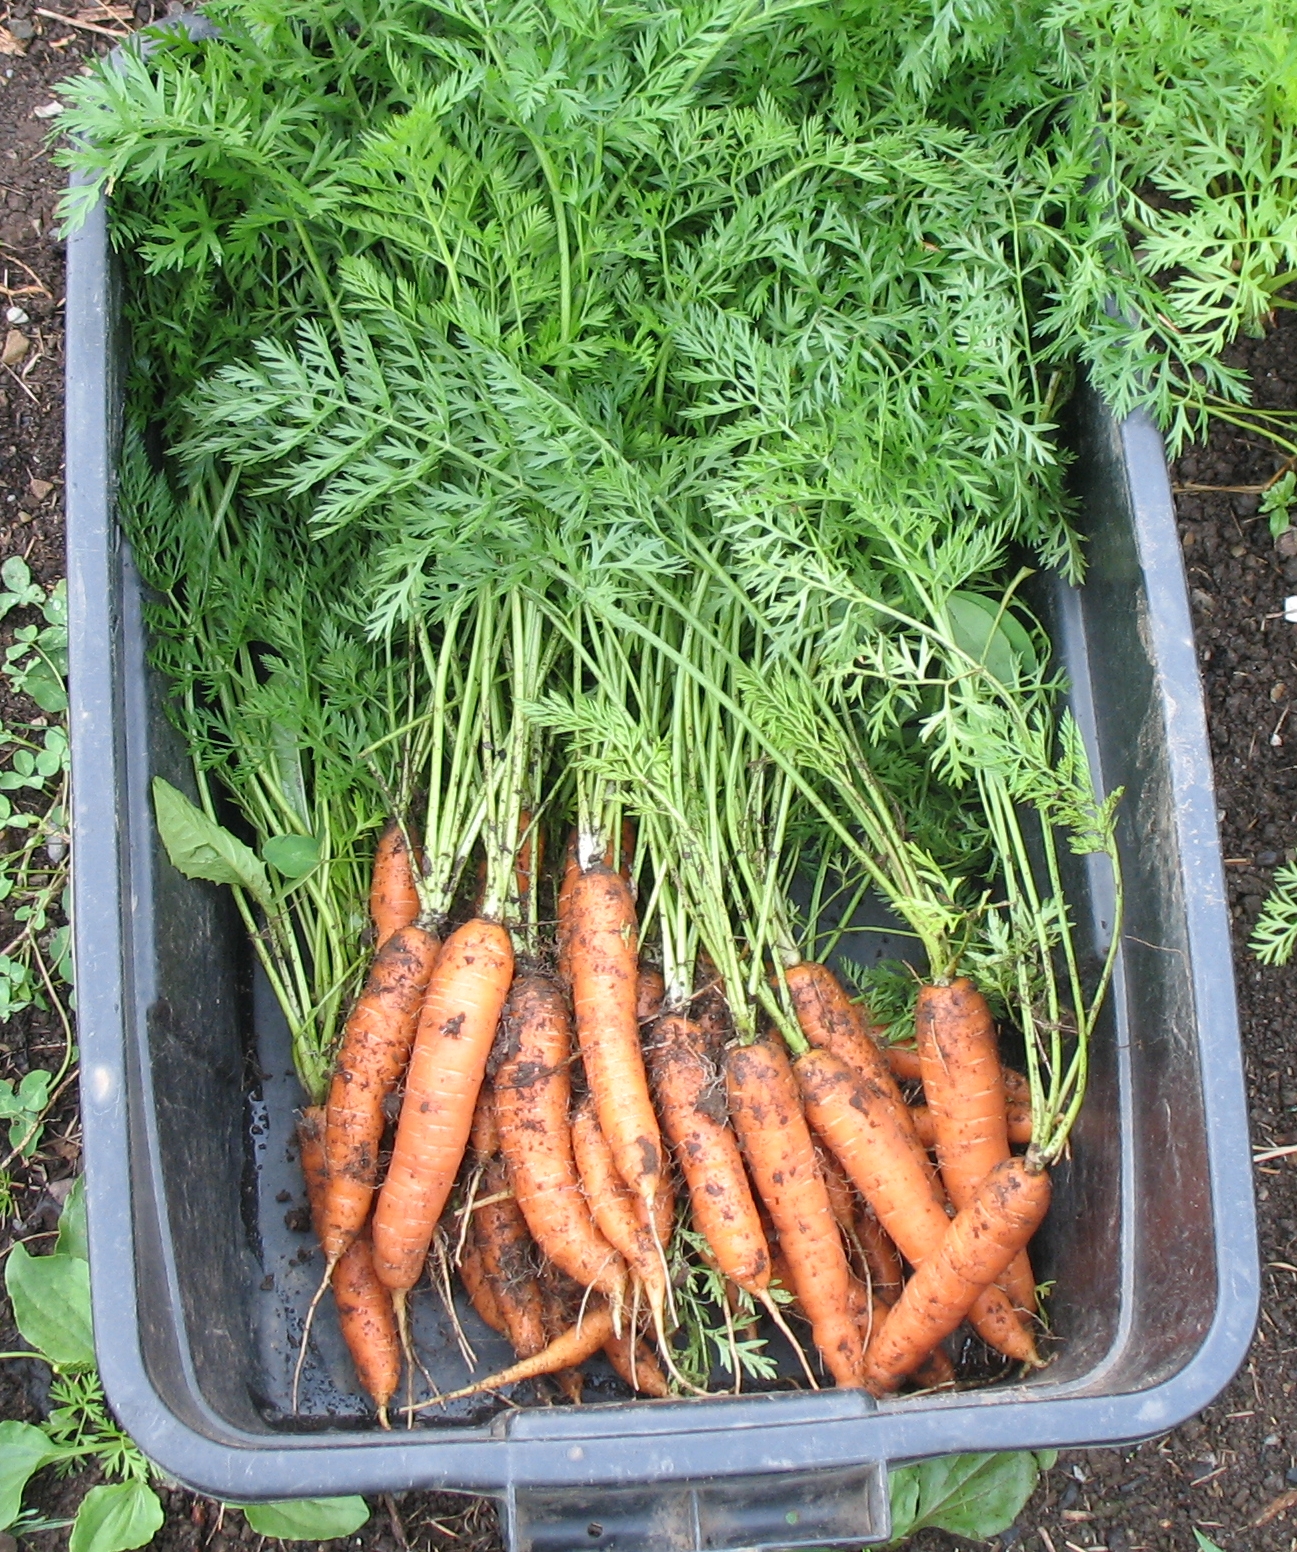
You will also want to ensure harvest at the optimum point in a veggie’s growth cycle, not too immature and not over-mature. Many veggies such as broccoli offer only a window of a day to two for the best harvest quality. This may mean picking in the rain rather than waiting for clear weather and an over-mature crop. During the growing season root crops such as carrots, beets, potatoes can be harvested on an as-need basis.
It is important to learn the optimum harvest point for each variety of veg. This is especially true when trialing a new variety, since each variety has its own best time to be picked, its own length of harvest window, and its own ability to stay fresh once harvested.
Green beans offer a good example, since some varieties will grow 8 to 10 inches long before the seeds start to swell, whereas others will start swelling their seeds at 5 to 6 inches. You can always tell who at market isn’t harvesting their beans at the right time when you are able to count the seeds in their bean pods. For most bean varieties, once the seeds start to swell the pods become stringy and starchy.
Schedule.
Each type of veggie has its own harvest schedule. For beans, peas, cukes, and summer squash we harvest every two to three days. Leafy greens we harvest on the morning of market day to ensure they are the freshest possible. Most of our markets during the week are in the afternoon so this works well for us. One problem we have is three Saturday markets, so we have to harvest many crops on Friday. We can keep the greens fresh by washing them in cold water and getting them into the cooler as fast as possible.
Time of day.
The time of day is very important to harvesting certain produce. Pick greens in the morning as early as possible before the day gets too hot. Get them out of the field. Beans and peas are better picked later in the day after the plants have dried off from the morning dew.
Harvesting can get pretty challenging when all the produce is coming in. As the season progresses the picking list gets longer and longer. Yet it is imperative to be familiar with each of your products and it’s harvesting needs.
The questions to ask yourself: What do I need? When do I need it? How much do I need harvest for any given market? Can this crop hold another day in field?
Who is doing the picking?
If you are working with a picking crew, determine what each person is good at and assign that individual to that job. Proper harvesting requires training the picking crew not to pick the crop too small before it is ready, but also to pick everything that is ready. Each of the crops has its ideal that we share with the picking crews, then frequently check on their work to assure they understand what we need. Once the crew knows what is expected, they can look at the picking list and go harvest without without further instruction. We pay our crew an hourly rate rather than a piece rate, so there is no tendency to pick just anything in order to fill the bucket. This also means we may have to re-assign the slow bean pickers to other jobs.
TRIAGE YOUR RETURNS ·•|•·
Although you’re ready for a new harvest today, before you decide what to pick, first go through everything you’ve brought back from the previous market and do a triage, that is divide it into what’s good enough to go back to market, what’s good enough to give away to your workers or a food pantry, and what’s going onto the compost pile or being fed to livestock. How well each item held up is dependent upon:
- what kind of item it is (onions hold up well but lettuce doesn’t),
- the item’s experience at market (was it on display in the sun or was it held in reserve as extra in case you needed it),
- your access to refrigeration and the ambient daily temperature,
- how many times the item has gone through the triage.
Of course some items need to be picked regardless of how much you currently have on hand. Zucchini and beans, for example, will begin to mature seeds as they grow larger, which inhibits the plant’s further flowering thus reducing future yields. This is when having animals or a local food pantry can come in handy.
HARVEST AND SHIPPING CONTAINERS ·•|•·
It is most practical to have various types of containers each one being best suited for its use, although often one type of container can serve more than one purpose. It all depends upon your choice of container type. Clearly, the best solution is to have as few different types of containers as possible while still having each type do it’s job well. It is also important for any containers to be relatively inexpensive so that replacement isn’t a problem, and so that enough of them can be on hand to handle the volume of produce that they as a group are expected to hold.
In the flow of produce from farm to market, the uses for containers are: 1) on farm harvesting; 2) transporting to market; and 3) displaying at market.
Harvesting Containers
All of our harvesting is done by hand and brought in from the field in a tractor drawn trailer, in the on-farm station wagon, or in a similar vehicle.
For on farm harvesting of relatively heavy, durable products from potatoes and rutabagas to cukes and tomatoes, we use plastic 5 gallon buckets. Almost all of them recycled from other uses, such as holding pickles, toppings and such from sandwich shops and bakeries. The opaque polypropylene buckets (any color) are best, since they don’t photo degrade as quickly those made of translucent polyethylene, which you are lucky to get a year’s use out of. New polypropylene buckets go for from $4-$6.
For harvesting of other lighter or more delicate and clean items such as lettuce, herbs, and cut greens we use wooden bushel baskets. These last three or four years, but they are preferred by our harvesters to the new plastic harvesting totes. A Maine source for new wooden bushel baskets can be found here.
We also use easier-to-clean plastic tubs for harvesting items such as beet 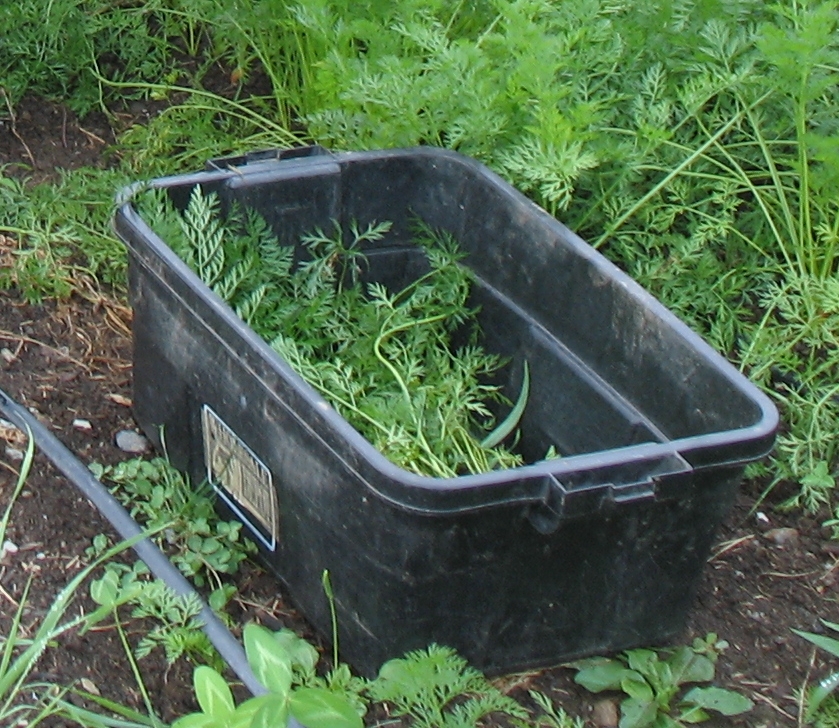 greens or bunching carrots which are dirty. greens or bunching carrots which are dirty.
Transport Containers
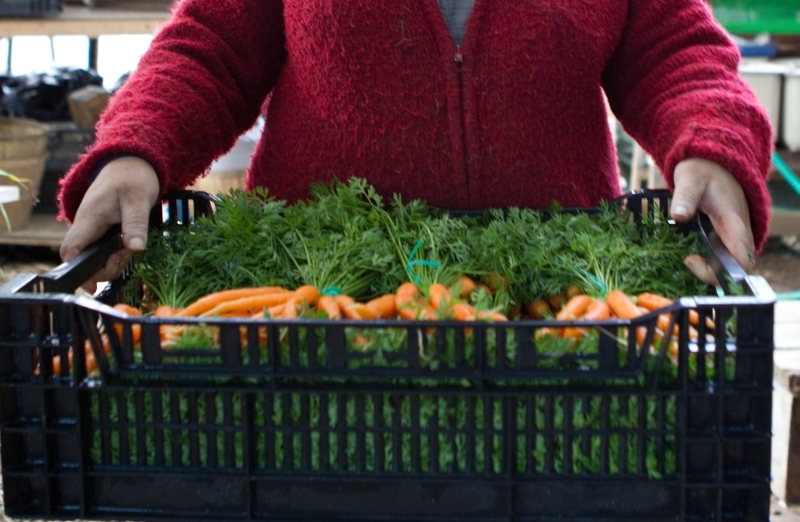
We travel to farmers’ markets in either a minivan or a long full-size van, depending upon the size market we are attending. Cramming as many containers as possible into each of these vehicles becomes a priority when choosing what type of containers to use. We have pretty much settled on three container types: the wooden eastern standard apple box (which holds just under a bushel); a half-height version of the same box; and a black plastic crate used in commercial shipping. These latter come in two sizes, shallow and deep, and stack five to a layer on a standard pallet. Made of heavy-duty black plastic, they are easy to hose down for cleaning and don’t seem to photo degrade, at least after five years. We get ours from Organic Growers Supply.
New wooden apple boxes go for from $5-$8. Make sure they are well made, using nails rather than staples or screws to hold them together. A Maine source of new apple boxes can be found here. A source in southern New Hampshire is here. Since many orchards have converted to pallet bins for apple storage, orchards often have apple boxes available or know where they can be found.
Each of these containers—the apple boxes and the crates—stack securely from floor to ceiling in our vans thus filling the available vehicle space most efficiently while protecting their contents on the way to market. Apple boxes can be stacked four high, while half boxes and black crates are stacked seven high on their way to market.
Display Containers
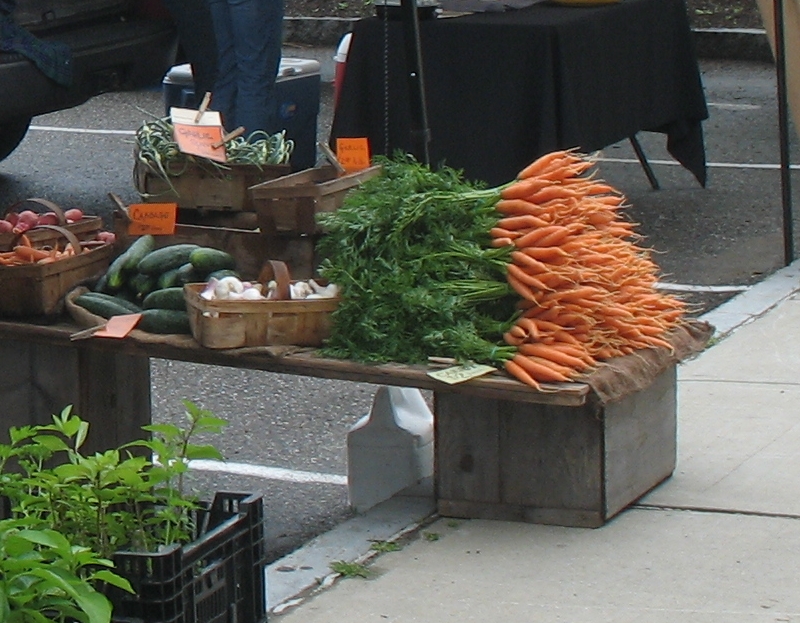
Too often beautiful produce at market is displayed in a hodgepodge of containers, giving the appearance that the grower rounded them up at the last minute. Cardboard—even wax impregnated cardboard—makes for a poor visual display at market, and cannot hold up to being wet.
 Here is where careful selection of containers saves time and money: we use our transport containers as our display containers. At market we unload the crates from our vehicle onto our tables, and our display is done. For a few items, such as those in pints and quarts, we have found they sell better when removed from their transport containers and placed directly on our market tables. The thus emptied transport containers are then used in building our display. The wooden apple boxes lend an ambiance of naturalness to our display, while the black plastic crates provide a wide display area for the produce. Often each of these containers is tilted toward the shopper for better viewing. Here is where careful selection of containers saves time and money: we use our transport containers as our display containers. At market we unload the crates from our vehicle onto our tables, and our display is done. For a few items, such as those in pints and quarts, we have found they sell better when removed from their transport containers and placed directly on our market tables. The thus emptied transport containers are then used in building our display. The wooden apple boxes lend an ambiance of naturalness to our display, while the black plastic crates provide a wide display area for the produce. Often each of these containers is tilted toward the shopper for better viewing.
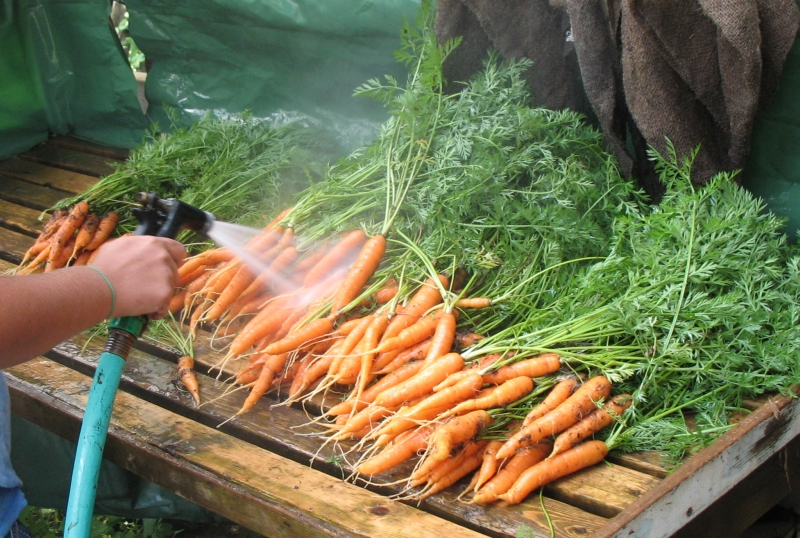
WASHING & BUNCHING ·•|•·
There’s more to prepping veggies then just washing and bunching. It has taken a lot of trial and error to get some of our products to market in the top condition. Each type of product has its special requirements and equipment. The first thing to consider is what you need for equipment. For years we washed our loose greens, spinach, lettuce mix, spicy greens in a sink and let them drain out in wooden bushel baskets. This was very time consuming and didn’t always get the water out very effectively. A few years ago we invested in a 5 gallon salad spinner, it was a big investment but well worth the money. These are available through Johnny’s Selected Seeds and restaurant supply companies. It very effectively gets most of the moisture out of the greens—and the drier you can get greens the better they keep.
A large wash tub is a must with large scale operations. Some people use old bath tubs. I came across a used double wash room sink made of fiberglass. Someone had put it out on the side of the road with a free sign, sometimes your in the right spot. This has held up very well and is easy to keep clean.
SORTING AND BAGGING ·•|•·
Choosing the best, leaving the rest: sorting begins in the field. Whether picking napa, daikon or string beans, it is all too easy to just select for maturity. Unless you know you have a definite market for imperfect quality specimens, then it is best to leave the seconds in the field, either unpicked or picked and tossed on the ground. These will never be totally wasted, since later they will be tilled under to add to your soil’s fertility.
Washing and bagging extends the sorting process. No one gets to inspect the produce closer than those who are washing and bagging, bunching or quarting it.
BUNCHING AND BAGGING MATERIALS ·•|•·
Twist Ties
We use three different twist ties for bagging and bunching produce. Four inch paper coated are used for small plastic bags, such as for bagged carrots; six inch plastic coated for bunching carrots with the greens still attached. The plastic coated ties hold up when wet. And six or eight inch wire bag ties for large bags, used for onions, carrots, and potatoes.
Elastic bands
These are used for bunching larger greens and herbs. Such as chard, kale, radish, scallions, bunching onions early in the season. It is a challenge to find the right sizes and weights which vary widely. You will want large elastics for chard, kale, onions and smaller ones for herbs.
Burlap bags
These are used, wet but not dripping, to cover the produce to keep it fresh. In our black plastic crates two are used, one on the bottom and one on the top. In wooden boxes only one is used on the top. These are removed at market and sometimes used as a table cloth. These hold up well and will last two or three years with proper handling. Any not in use are hung to dry. We get these from Organic Growers Supply in Clinton, ME.
Plastic & Mesh Bags
We have found that bagging a lot of the produce moves it faster at market and keeps the produce fresher. Again we use different sizes for different product.
Gallon zip lock bags we have found to be the most useful for packaging greens. I usually buy large supplies at The Dollar Store, often cleaning out much of their shelf each time we shop since they offer no discount for bulk ordering. After much research we found they have the best price. These are food grade storage bags and easily hold ½ lb. without squashing the greens.
Regular plastic bags we usually order from Fetpak, although there are several other sources with similar pricing. We have found 2 mil thickness to be about right for the smaller bags, since it withstands considerable handling without breaking. For the 25 lb. size, 3 mil is a more prudent choice. Minimum orders are usually 1,000 bags.
Small bags for two to three pounds of carrots are gusseted, 6” x 4” x 15” x 2 mil.
Medium bags We use a slightly larger bag 8” x 4” x 18” for our number two carrots which we package in 5 lb. quantities.
Large bags are 15” x 30” x 3 mil with ventilation holes and not gusseted for holding 25 lbs. of carrots, parsnips, etc. We also have a 15” x 30” gusseted which we sometimes use for bulkier produce that does not fit the standard 25 lb bag.
Mesh bags are used for onions, garlic, shallots. The smaller size holds from 5 lbs. to 10 lbs. and the larger size holds from 25 lbs. to 50 lbs. The smaller size we buy from Organic Growers Supply, and the 50 lb. size we order from Wasserman Bag in Brooklyn, NY, in lots of 500.
Tools
Scissors
Are used for trimming various produce; roots and tops on leeks and scallions; trimming up greens and herbs. We have several sizes and favorites. OXO’s p430 spring loaded, self-opening scissors are our newest acquisition, ordered directly from the OXO website.
Knives
We have several sizes for use in various ways, such as field trimming roots from rutabaga, celeriac, etc.
CHOOSING AND BUILDING THE SITE ·•|•·
Deciding where you will be doing all your washing, bunching, packing and other preparation of veggies for market requires some serious consideration. A good location can make your everyday work experience easier for years to come; a poor location can frequently make working condition miserable as well as generate needless extra work. Some things to consider when choosing a location for your veggie prep area are:
- Accessible in all weather conditions where it is likely to be used. Think ahead five years on this one!
- Well drained, with no possibility of mud or puddles due to excessive rains, snow melt or washing veggies.
- In the shade if possible to keep produce and workers cooler in the hot summer months.
- Near where you park your market vehicles so produce doesn’t have to be hauled great distance prior to and after market.
- Handy to a source of clean (drinking quality) high pressure water from a well or public water supply.
- Near your walk-in cooler for produce that needs to be refrigerated. Or with space to build your cooler in the future.
- Near ehough to a source of electricity to power a radio and lights for those after-dark bunching sessions.
- Open enough to build a roof over your whole operation so workers, certain produce, and packing items can stay dry on rainy days.
- A large two basin washing sink that can hold a bushel of greens at one time. A bathtub is a bit over-sized, but a regular kitchen sink is definitely too small. Any such washing basin needs to be drainable from the bottom.
- Do you need an actual building, or will a simple outdoor shelter work as well.
The Problem of Mud. Note that your veggie wash water runoff will contain significant quantities of mud and silt—prepare for this when thinking of the directing the runoff. Also consider that recycling your veggie wash water can have great benefits for your thirsty garden. We address both issues by using the tough plastic that floating row covers come packaged in to direct used wash water into a 5 gallon bucket placed in a bathtub. The mud settles in the bucket and the water overflows the bucket into the bathtub, where a sump pump sends the water to a series of 55 gallon drums siphoned together. When these drums are nearly full, the water is gravity fed to the lower gardens through drip tape. When mostly full, the mud bucket is poured onto our greenhouse beds.
Further description of our veggie prep area can be found at here.
|