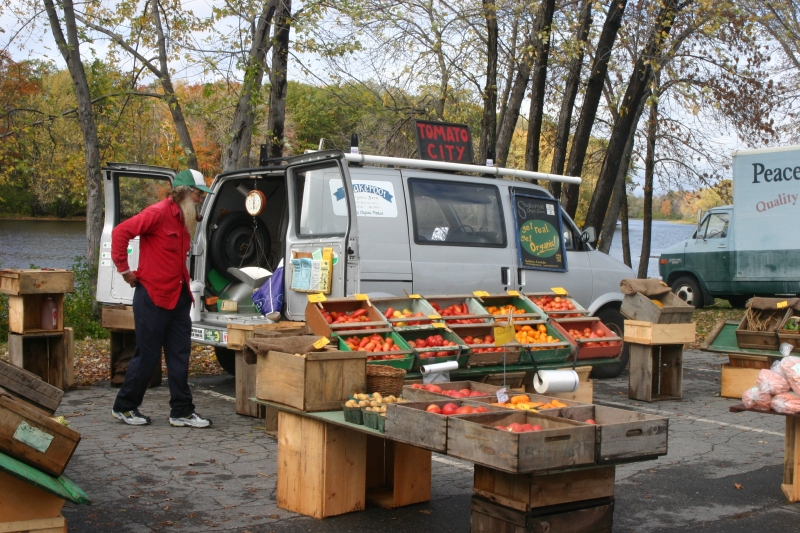
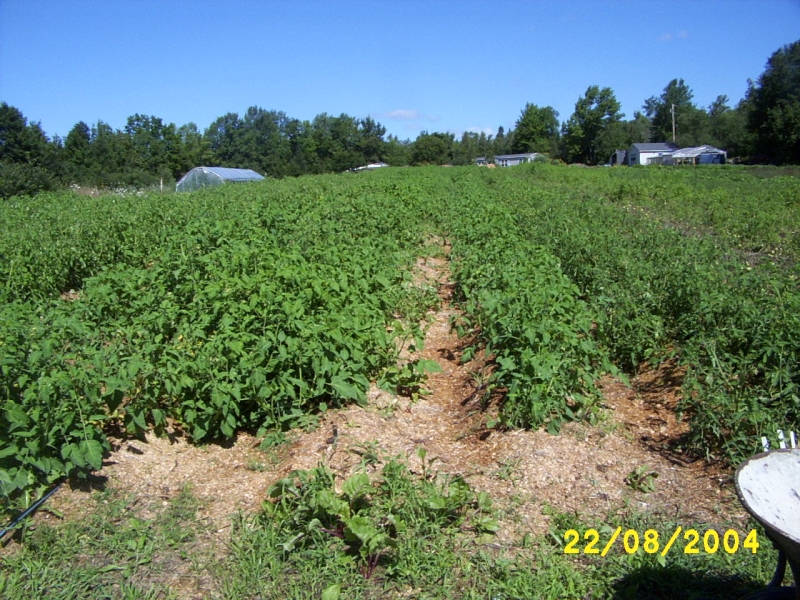
Tomato Seed Savingby Tom Roberts, fall 2004 We integrate tomato seed production at Snakeroot Organic Farm into our overall tomato production and marketing strategy.
Yet drying and canners alone can’t use up all those otherwise fine tomatoes with growth cracks, wireworm holes, mouse bites, and so forth. This is where seed saving comes in. Of course, saving my own seed also saves on the expense of buying seed, and assures that if a seed company no longer has an heirloom variety available, I need not worry since I am my own supplier. Every year we trial several new heirloom varieties, and if we like one especially well, we’ll never buy that seed again! This is one reason why seeds company prefer to sell hybrid seed. Tomatoes in general tend not to cross-pollinate, although some of the potato-leaved varieties will cross more readily. Those types we isolate in the years we are planning to save their seeds. Remember, in one year you can easily save ten years worth of seed, so not every variety you save needs saving every year. Cherry tomato seeds, although smaller than regular tomato seeds, are saved exactly the same way. You can also save seeds from hybrid tomatoes, but the resultant offspring will display great variation, with few looking like the hybrid parent. Continually selecting seed from those variations can lead to some very interesting “new” tomato varieties. This, in fact, is how we have produced our Snakeroot Golden Arrow and Snakeroot Golden Cherry tomatoes.
So I just started throwing the whole seed tomatoes into a bucket, filling one bucket after another, until I had two dozen buckets filled with tomatoes for contracted seed plus several more for varieties just to save for our farm use. Clipped to the rim of each bucket is a clothespin holding a slip of cardboard with the variety name in indelible marker. Cardboard, like from a cereal box, holds up better than paper in the weather. A warning here: this rotting of the tomatoes in buckets is a very stinky process, one better done outdoors than in the kitchen or basement. |
|
|
Now I was faced with the prospect of still having to remove the seeds from inside the tomatoes. Experimentation determined that a strong spray from the hose wouldn’t break apart the tomatoes. The kitchen potato masher seemed like it would work, but it didn’t. I even considered removing my shoes and squashing them grape-fashion. After spending several days eyeing all those buckets while pondering how to proceed, Lois’s daughter Lori suggested a drill powered paint mixer—she even bought one for us. That did the trick. If you’ve never seen one, a paint mixer is a rod about 18 inches long, one end of which fits into a power drill, and the other is equipped with a loose corkscrew-like fixture that actually does the job of mixing the paint—or in my case, the tomatoes. Before mixing, all the tomatoes should be ripe to the point of falling apart. A bucket should be no more than about three quarters full, lest the swirling tomatoes spill over the rim. Mixing a bucket takes about thirty to forty-five seconds during which time the bucket contents are transformed from individual tomatoes into tomato soup—just the right consistency to leave for a week to ferment. Fermenting should be done in a fairly warm environment—we do it in the greenhouse after October—and you will soon see a layer of fuzz form on the top of the fermenting buckets. Did you ever wonder why ripe tomato seeds don’t sprout in the warm wet environment inside a tomato? It’s because each seed is contained in a bag of jelly which acts as a sprout inhibitor. Fermenting is our way of removing that bag of jelly, a process which in nature would be accomplished by the tomato falling to the ground and rotting, or traveling through the digestive tract of an animal. |
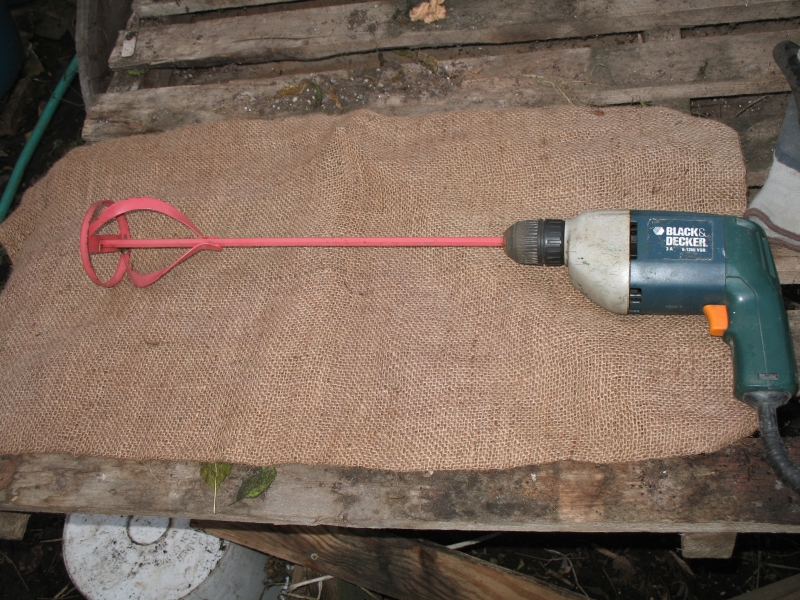 The paint mixer, a standard tool for the drill available at most hardware stores. The paint mixer, a standard tool for the drill available at most hardware stores. 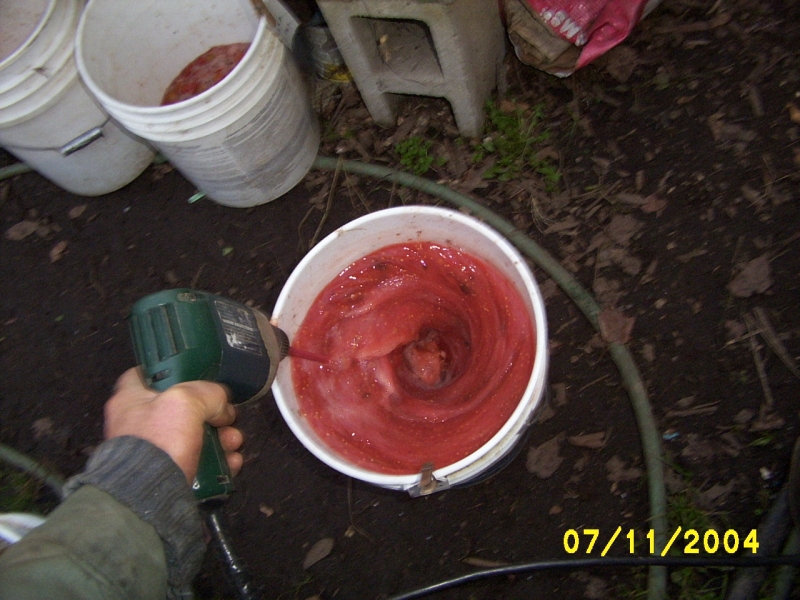 Using the mixer to stir the tomatoes. Another outdoor job where spillage is a possibility. The aim here is to break up any remaining seed-bearing clumps of tomato. Only tomatoes that went into the bucket a week ago already over-ripe will be ready to release their seeds; less ripe tomatoes will take quite a beating from the mixer and still remain in chunks. 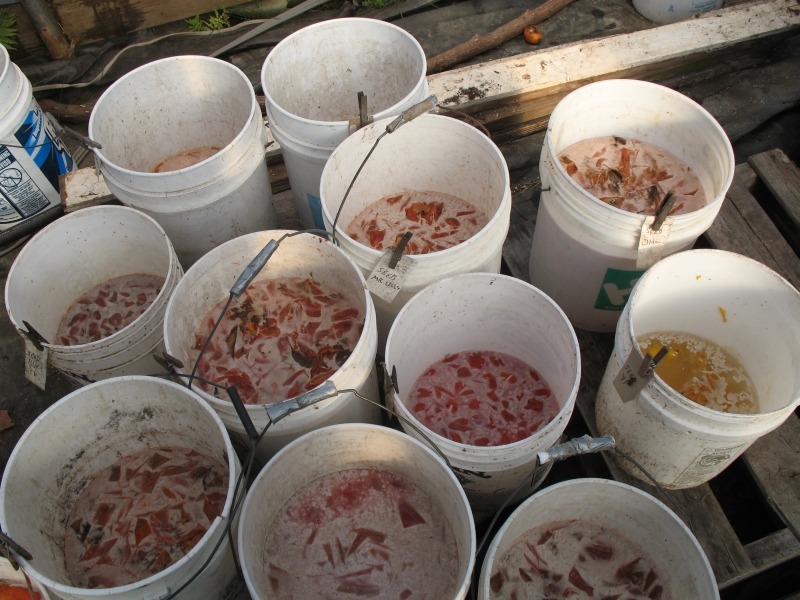 About a week after mixing, fuzz on the buckets. Note the yellow tomatoes on the right. Best not to breathe through your nose when handling this stage. |
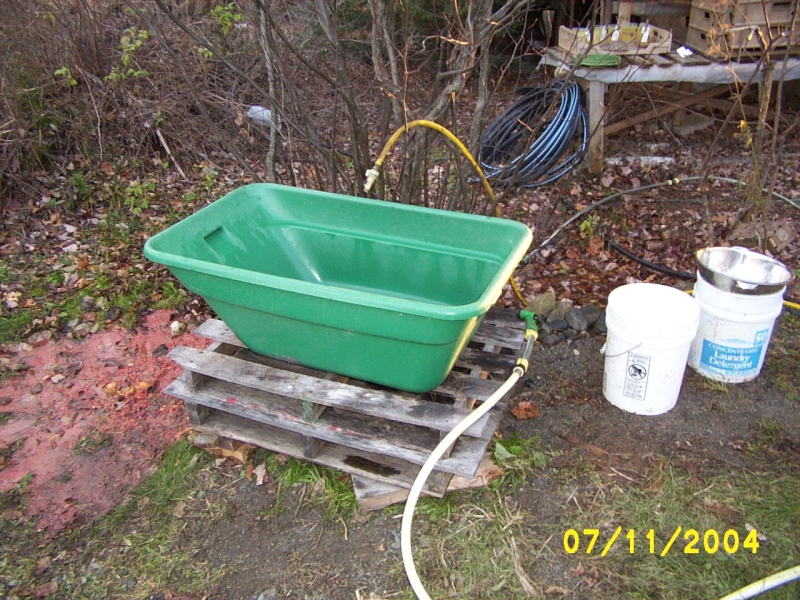 All set up and ready to go, the Wonder Wagon tub removes from its wheeled frame very easily. Setting it up on a few pallets allows the excess water to be tipped out into slop buckets that will be taken to the compost pile. 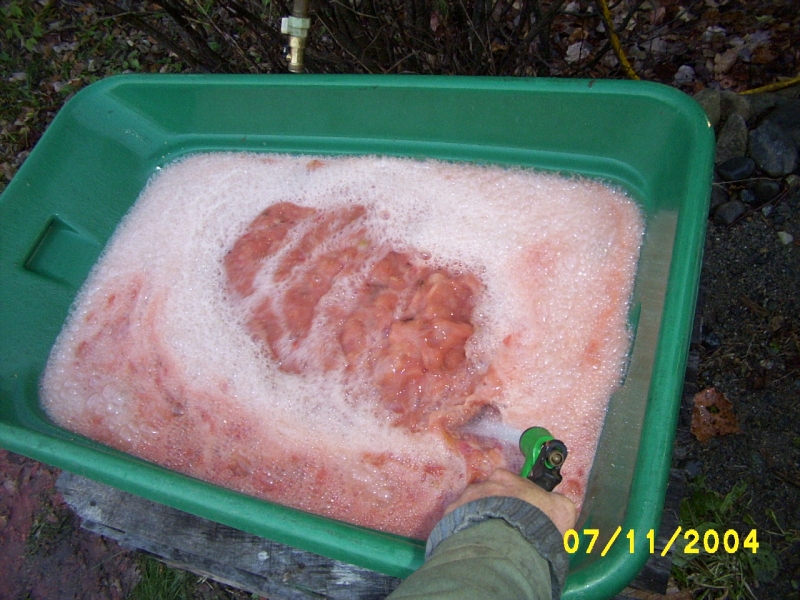 A hard spray of water in the tub of tomatoes creates a lot of foam. The tub can handle up to three buckets at a time, if you have that many tomato seeds of one variety that you are saving. |
A week later I pour three buckets of stinking fermented tomato slop into my Wonder Wagon, a fifty gallon tub on wheels. (Wonder Wagon, produced in Windham, Maine, by True Engineering, Organic Growers Supply catalog No.9277.) We pop the green body out of the frame for better control while dumping off the floating tomato pulp. During the fermenting week, the pulp and seed rise to the top of each bucket floating atop a yellowish thick fluid comprising two thirds the volume. Surprisingly few seeds sink to the bottom of this dense yellowish fluid, which means the fluid can be safely discarded after the pulp-and-seeds are poured off into the tub. What follows is a somewhat wet and messy process and it is best to find a suitable location for it beforehand. To separate the seeds from the fermented pulp, a strong spray from a hose nozzle works well. Doubling or tripling the volume with this spray creates a deep foam and thins out the whole mess, allowing mature seed to sink to the bottom. Tomato seeds just barely sink, so when the slurry is too thick, the seeds remain suspended instead of sinking to the bottom. Thus the spray of water not only mixes up the slurry, but also thins it out to the point where the seeds can sink. |
|
After allowing a moment for the seed to settle, the next step is to pour off into buckets everything that is floating—which will be later carried to the compost pile—until all that is left in the tub is seed and tiny tomato parts in about an inch of slurry. Next I pour this last inch into a clean bucket and repeat a few times the strong hose spray then pouring off what floats until what remains is clear water with seed and small tomato parts at the bottom. I have come to be fairly aggressive in pouring off even the first few tomato seeds that start to be poured out, as these are the lightest of the seeds and less likely to germinate well. |
|
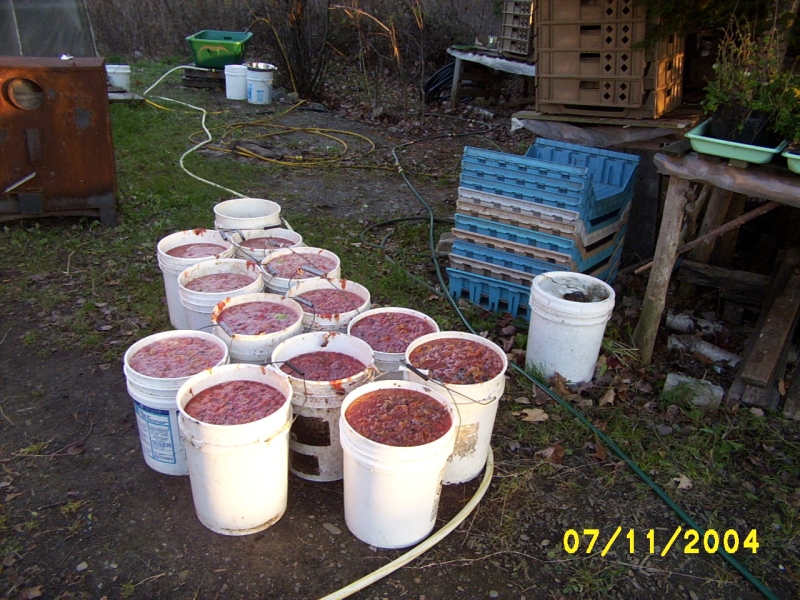 Buckets of now nearly seedless tomato slurry poured off from the green tub. |
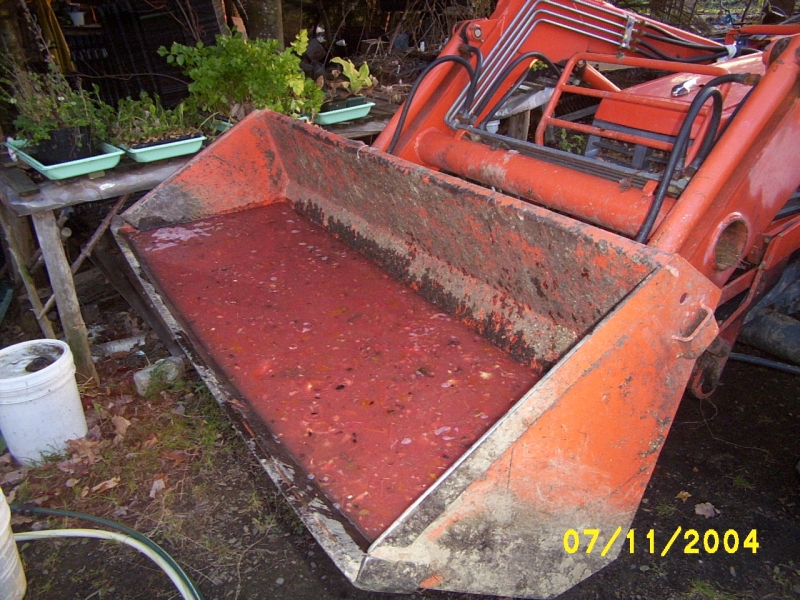 The buckets are then poured into the tractor bucket which is headed for the compost pile. |
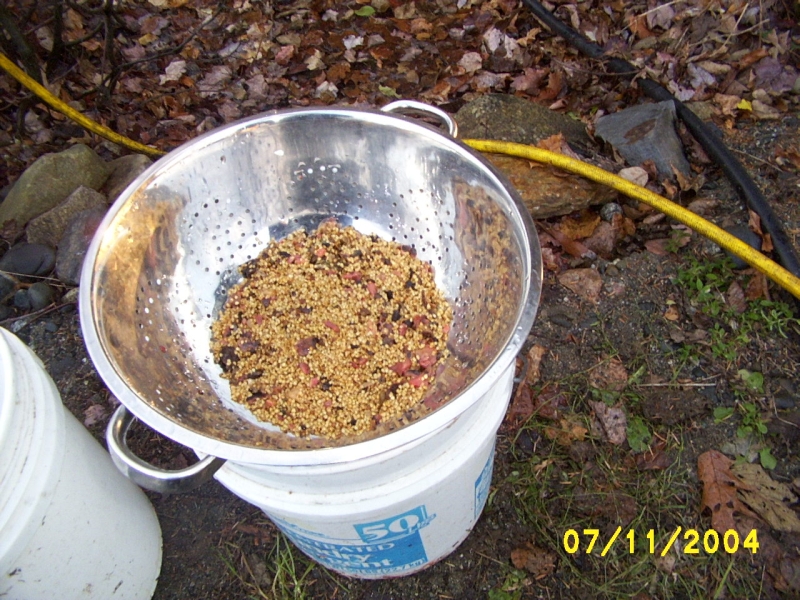 Forcing the seeds thru a colander removes any non-floating detritus. This step is only necessary when there are just too many small pieces of tomato detritus still mixed with the seeds. With luck, your seeds will be clean enough and you can skip this step. A few stray pieces can be easily separated out by hand once the seeds are dry. |
What remains then gets poured through a colander over a second clean bucket. The colander I use has 5/32 inch holes which allow seeds, but not the last of the tomato debris, to pass through. (I determined the hole size by passing a 5/32 drill bit through the holes.) Again the spray from the hose is needed to coax the seed through the colander; this takes a few minutes. After pouring off most of the water, refilling and pouring off again until the water is clear, the last inch of water and the clean seed is poured thru a tea strainer. The seed then goes into a quart yogurt container by inverting the container over the strainer and flipping everything over. |
|
To eliminate seed borne diseases, the seed is then covered with a ten percent bleach solution (one part household bleach to nine parts water) and left to stand forty minutes. I prepare a few quarts of this bleach solution ahead of time and store it in a jug, all labeled and ready to use. |
|
|
In trays that are suitable for stacking, place several layers of newspaper (perhaps 20 layers or so). After the bleach soak, the seed is rinsed with water and poured thru a second tea strainer (to avoid contamination from the pre-bleach-soak strainer), allowed to drain a bit, and then spread on the newspaper to dry. (Do NOT use paper towels for this, or you will never get all of the seeds removed from the towels!) Spread out the clump of seeds with your fingers to speed drying and prevent mold. If we are processing more than one variety at a time, we write the variety name right on the newspaper. What you actually have on the newspaper are many clumps of seed, each small enough to dry in a few days. We stack trays lined with several layers of newspaper behind a fan, and within two days the seeds are dry enough to rub the clumps of dried seed between the palm of my hands until they separate into individual seeds. |
 Finally after pouring thru a large tea strainer, we have our tomato seeds, although still quite wet and clumped together. The original variety tags from the buckets move along to the yogurt containers to keep track of multiple varieties. Try not to lose track of your varieties, since few things are more frustrating than losing track of which variety is which, since all tomato seed looks remarkably similar. |
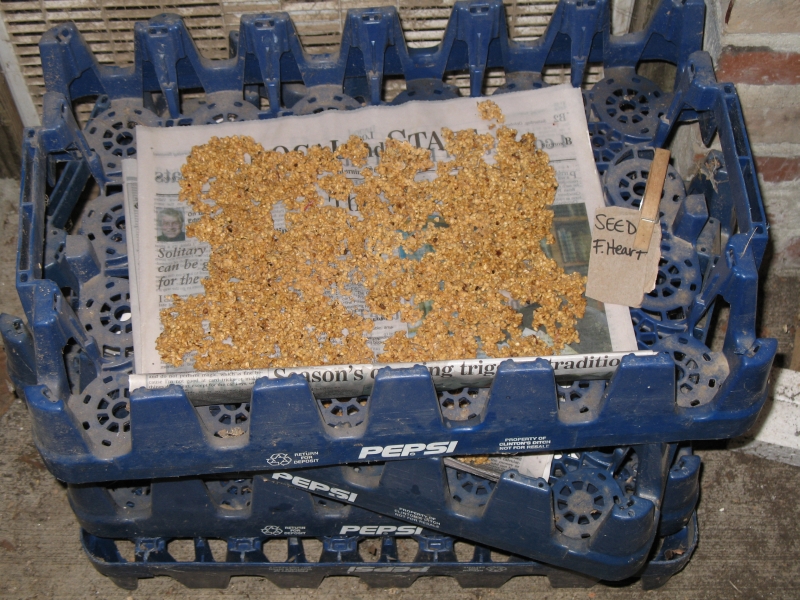 Seeds drying on newspapers in stackable trays, with window fan behind. In a few days these will be dry enough to package and put into storage. The trays are on the upwind side of the fan, not the downwind side. |
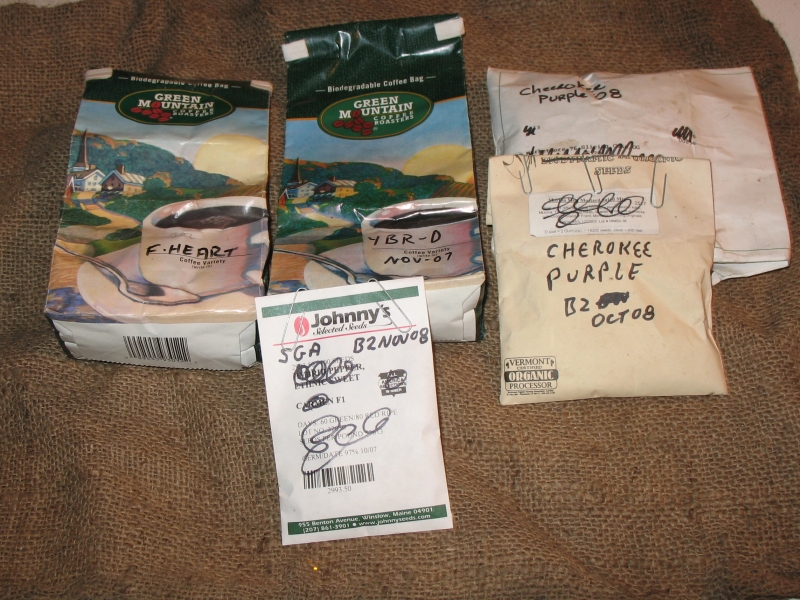 Seeds packaged and labeled for storage. Paper clips work well to keep the envelope flaps closed. Don’t forget to include labeling the year the seed was saved. Tomatoes seeds are relatively long-lived need only be saved every five to ten years. |
|
The seed is then stored in a recycled (non-tomato!) seed envelope and labeled with the variety, date—and a batch number if you are doing more than one batch of the same variety. For varieties where we are saving many ounces of seed, we store the seed in recycled one pound coffee bags. Tomato seed will remain viable for several years if not abused in storage by high heat and/or moisture. In 2002 we successfully grew Nepal tomatoes from seed bought in 1992 and kept in the house at or near room temperature. To insure even longer life, you can put your seed packets in a zip lock freezer bag in the freezer. Because we store a fairly large quantity of both bought and saved seed, we store our seed in metal cans in the woodshed, where for three seasons the cool to freezing temperature is close to ideal. The metal cans reduce moisture absorption and prevent critters from chewing on the packets. I have described here our tomato seed saving system that has developed over the past few years. It works well for us. My hope is that I may have given you a hint or two that will make your seed saving a bit easier, or even to inspire you to begin saving seeds for the first time. If while reading the above, you find you have developed an even better technique, please share it with us. Tom Roberts and Lois Labbe operate Snakeroot Organic Farm in Pittsfield, Maine, where we market our two acres of certified organic produce, herbs and seeds at up to six farmers’ markets a week from May till November. Tom can be contacted at tom@snakeroot.net |
|