Building our new sugarhouse
Our third sugarhouse was built in late November 2013 with help
from Alyssa, Elmer, Jess, Ryan, Jason, and Alex.
Click on photos to enlarge.
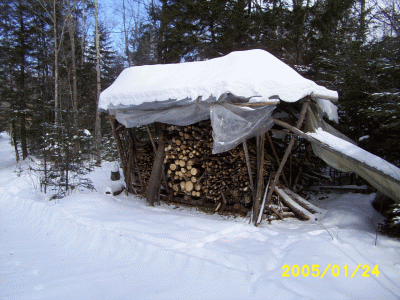 In 1997 we started tapping our maple trees. At that time we tapped about ten trees and we boiled down the sap in the house on a wood cookstove. By 1998 we were tapping over fifty trees and we were beginning to use maple tubing to collect most of the sap into one location. We purchased the smallest evaporator we could find and built a small 12′ x 12′ shed in the woods (photo, right) to house the evaporator and boil sap. By 2000 we were placing about 125 taps. In 1997 we started tapping our maple trees. At that time we tapped about ten trees and we boiled down the sap in the house on a wood cookstove. By 1998 we were tapping over fifty trees and we were beginning to use maple tubing to collect most of the sap into one location. We purchased the smallest evaporator we could find and built a small 12′ x 12′ shed in the woods (photo, right) to house the evaporator and boil sap. By 2000 we were placing about 125 taps.
Over the next few years as we gradually expanded 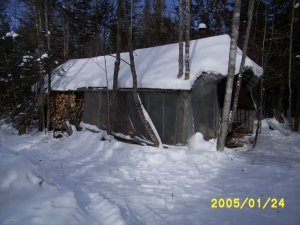 the sugarbush to more remote sections of the woods, and as we expanded to over 200 taps we found ourselves hauling sap a quarter mile uphill to our sugarhouse. So in the fall of 2002 we built a larger sugarhouse further down into the woods (photos, right and below) where all the sap could arrive via tubing. This has served us well for eleven years. Yet the sugarbush has been maturing and each year or two we add a few more trees to the lines. We are now placing around 450 taps every spring. For the past several years we have been boiling nonstop during sugaring season from eight in the morning until ten at night, and yet we still predictably fall behind by several days at the height of the season. We clearly needed a larger evaporator, but a larger evaporator would not fit into our current sugarhouse. the sugarbush to more remote sections of the woods, and as we expanded to over 200 taps we found ourselves hauling sap a quarter mile uphill to our sugarhouse. So in the fall of 2002 we built a larger sugarhouse further down into the woods (photos, right and below) where all the sap could arrive via tubing. This has served us well for eleven years. Yet the sugarbush has been maturing and each year or two we add a few more trees to the lines. We are now placing around 450 taps every spring. For the past several years we have been boiling nonstop during sugaring season from eight in the morning until ten at night, and yet we still predictably fall behind by several days at the height of the season. We clearly needed a larger evaporator, but a larger evaporator would not fit into our current sugarhouse.
The hours spent boiling sap is a great time 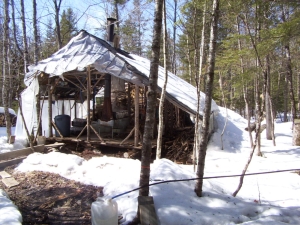 to contemplate the future. Did we want to expand the current sugarhouse or should we build another one? And if so, where? How would we get all the sap to it? How would we get the firewood to it? For three years we mulled over these questions and finally decided to build a little further downhill in the woods, a few hundred feet from our second sugarhouse. In the spring of 2013 as the snow began to retreat from sections of the woods we scouted out a suitably level location and began to clear a road to it through the woods. Then maple season ended and our attention progressed from the woods and sugarbush to the greenhouses and fields and farmers’ markets. to contemplate the future. Did we want to expand the current sugarhouse or should we build another one? And if so, where? How would we get all the sap to it? How would we get the firewood to it? For three years we mulled over these questions and finally decided to build a little further downhill in the woods, a few hundred feet from our second sugarhouse. In the spring of 2013 as the snow began to retreat from sections of the woods we scouted out a suitably level location and began to clear a road to it through the woods. Then maple season ended and our attention progressed from the woods and sugarbush to the greenhouses and fields and farmers’ markets.
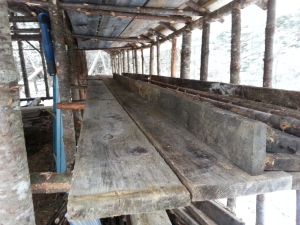
In November work began again with felling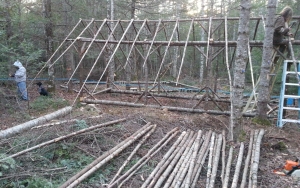 and limbing trees, some of which we would use to build the structure and some we would cut to four foot lengths for firewood. Since the crew working in this project (Ryan, Alex, Jess and Alyssa) had never built a log pole structure before, we began by building a free standing 8′ x 18′ woodshed (photo, right and below), using old greenhouse plastic for the roof. Aside from being a good training excercise, this also provided a place to put all the firewood once it was cut. Clearing away the firewood left more room to lay out and review the poles we would be building with. and limbing trees, some of which we would use to build the structure and some we would cut to four foot lengths for firewood. Since the crew working in this project (Ryan, Alex, Jess and Alyssa) had never built a log pole structure before, we began by building a free standing 8′ x 18′ woodshed (photo, right and below), using old greenhouse plastic for the roof. Aside from being a good training excercise, this also provided a place to put all the firewood once it was cut. Clearing away the firewood left more room to lay out and review the poles we would be building with.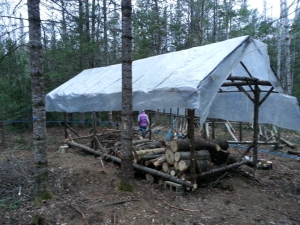
The sill logs to be used would have to be quite sizable for a larger building like the sugarhouse was to be. A green 30′ spruce log tends to be quite heavy, and it took a minimum of three of us to wrestle two of them into position, one after the other. Once we had them laid out, it was decided to re-orient the building by 90 degrees. More wrestling. Then the cross pieces were nailed into place and fourteen 6′ verticals cut, nailed into position and braced. For a much more detailed explanation (with lots of photos) of how we put such log pole structures together, see our page on Building Techniques.
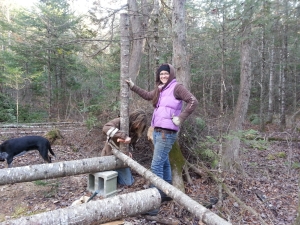 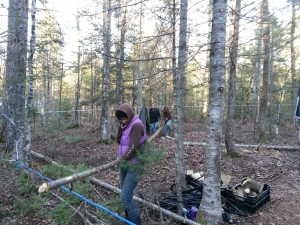
Construction of the sugarhouse went along quickly once the newly trained crew had the experience of building the woodshed under their belts. Jess, Ryan and Alex erected all 14 verticals, on top of which they attached each two-piece top sill. Then came the seven cross pieces connecting the top sills, and on them the seven short verticals supporting the two-piece ridge pole. Elmer secured the rafter poles by screwing them to the ridgepole as Alyssa nailed them to the tops sill. The overhanging of the rafters were cut off after they were secured in place.
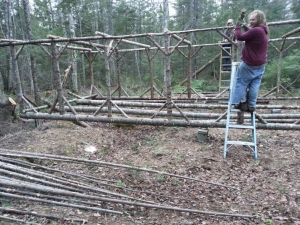 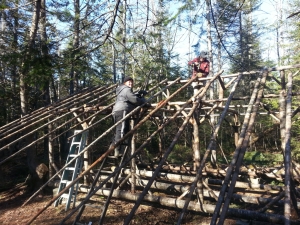 Once the skeleton of the sugarhouse was completed, we were faced with putting a roof on it. In the past on a building of this size I have covered the rafters with OSB, then tar paper, then asphalt shingles. While this produces a good and long lasting roof, I was never pleased with the time, effort and skill it took to build. So I decided to try a steel roof instead. I had never installed a steel roof before, and the major worry was how it would be attached given the irregular poles being used for rafters. Once the skeleton of the sugarhouse was completed, we were faced with putting a roof on it. In the past on a building of this size I have covered the rafters with OSB, then tar paper, then asphalt shingles. While this produces a good and long lasting roof, I was never pleased with the time, effort and skill it took to build. So I decided to try a steel roof instead. I had never installed a steel roof before, and the major worry was how it would be attached given the irregular poles being used for rafters.
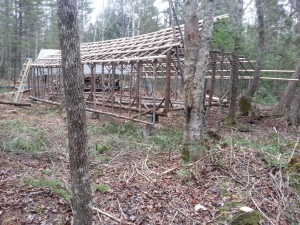 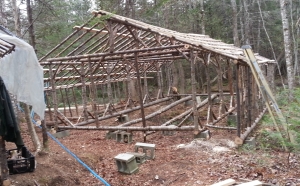 The solution was to use 2×4’s for the purlins, which smoothed out many of the irregularities. Two 16-footers stretched the length of the roof, and we used 30 of them. Luckily our new box truck that we had been going to market with was just the vehicle to haul them home. A call to Mid Maine Metal in Newport and a visit to their website allowed me to calculate how much steel to order and to estimate the cost. The custom-cut order was ready in a few days and again our box truck was ideal for bringing them back to the farm. We opted for one section of polycarbonate as a skylight, a feature we discovered in our second sugarhouse to be a real asset. The solution was to use 2×4’s for the purlins, which smoothed out many of the irregularities. Two 16-footers stretched the length of the roof, and we used 30 of them. Luckily our new box truck that we had been going to market with was just the vehicle to haul them home. A call to Mid Maine Metal in Newport and a visit to their website allowed me to calculate how much steel to order and to estimate the cost. The custom-cut order was ready in a few days and again our box truck was ideal for bringing them back to the farm. We opted for one section of polycarbonate as a skylight, a feature we discovered in our second sugarhouse to be a real asset.
We used the tractor and firewood trailer to haul both the 2×4’s and the metal roofing to a location close to the building site, then carried them to the site by hand. We placed the 2×4’s every two feet—the maximum recommended since we knew the location would not be a windy one. Jason, Alyssa and I moved the steel into position and took turns climbing up onto the roof to screw it on. The next day it rained heavily. Finally I had to straddle the top to screw on the ridge cap. The building was now minimally ready for winter, and we can continue to work on the inside under cover. During the winter we will construct the shelving, put in a floor and add a cut-to-length firewood stacking area as we have the time and can afford the materials.
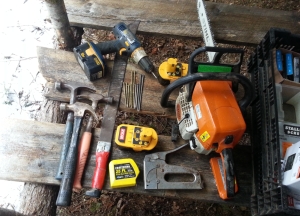
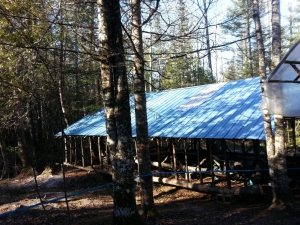 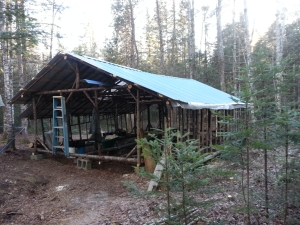 The tools for this entire job consisted of 3 hammers, a portable drill (and 7 rechargeable batteries!), a chainsaw, 3 ladders, 2 machetes, and a 25′ tape measure (photo, below left). The major costs, aside from paying the crew, were $250 for 2×4’s for the roof purlins, $980 for the steel roofing, and around $200 for about 30 lbs. of nails and screws; this comes to about $1500 in all, which is not bad for a 30′ x 22′ building. Of course we still have to put in a floor in 2/3 of the building and purchase a new evaporator which will cost at least twice what the building cost. That purchase, and re-routing the maple lines to the new sugarhouse, will probably have to wait for the 2015 season. Although much of the work could have been done by a single person, the minimum number of people would have been two, but a third and sometimes fourth person sure came in handy for some of the work. The entire project, from clearing the woods to attaching the roof took about two weeks. The tools for this entire job consisted of 3 hammers, a portable drill (and 7 rechargeable batteries!), a chainsaw, 3 ladders, 2 machetes, and a 25′ tape measure (photo, below left). The major costs, aside from paying the crew, were $250 for 2×4’s for the roof purlins, $980 for the steel roofing, and around $200 for about 30 lbs. of nails and screws; this comes to about $1500 in all, which is not bad for a 30′ x 22′ building. Of course we still have to put in a floor in 2/3 of the building and purchase a new evaporator which will cost at least twice what the building cost. That purchase, and re-routing the maple lines to the new sugarhouse, will probably have to wait for the 2015 season. Although much of the work could have been done by a single person, the minimum number of people would have been two, but a third and sometimes fourth person sure came in handy for some of the work. The entire project, from clearing the woods to attaching the roof took about two weeks.
Tune in later as we continue our work on this sugarhouse. Visit us during sugaring season (late Feb. to early Mar.) to see a really low budget sugaring operation built over fifteen years and to see the new sugarhouse in person. |


