The
Evolution of the Farm Table
at
Snakeroot Organic Farm
by Tom Roberts, April 2012
Click on photos to enlarge.
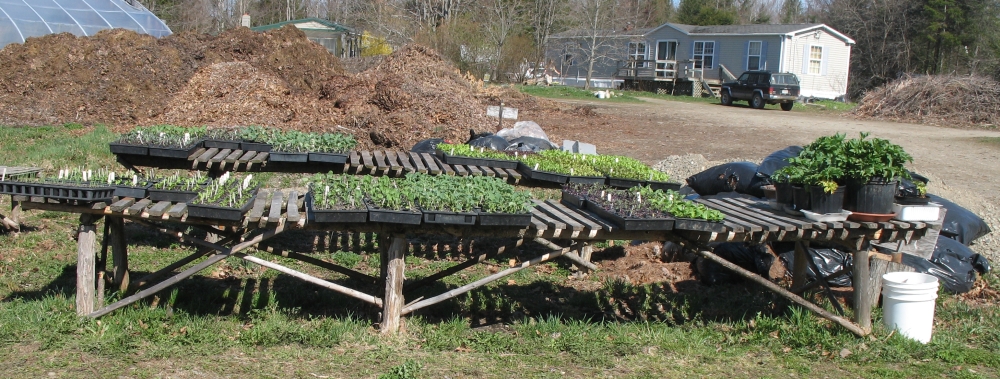
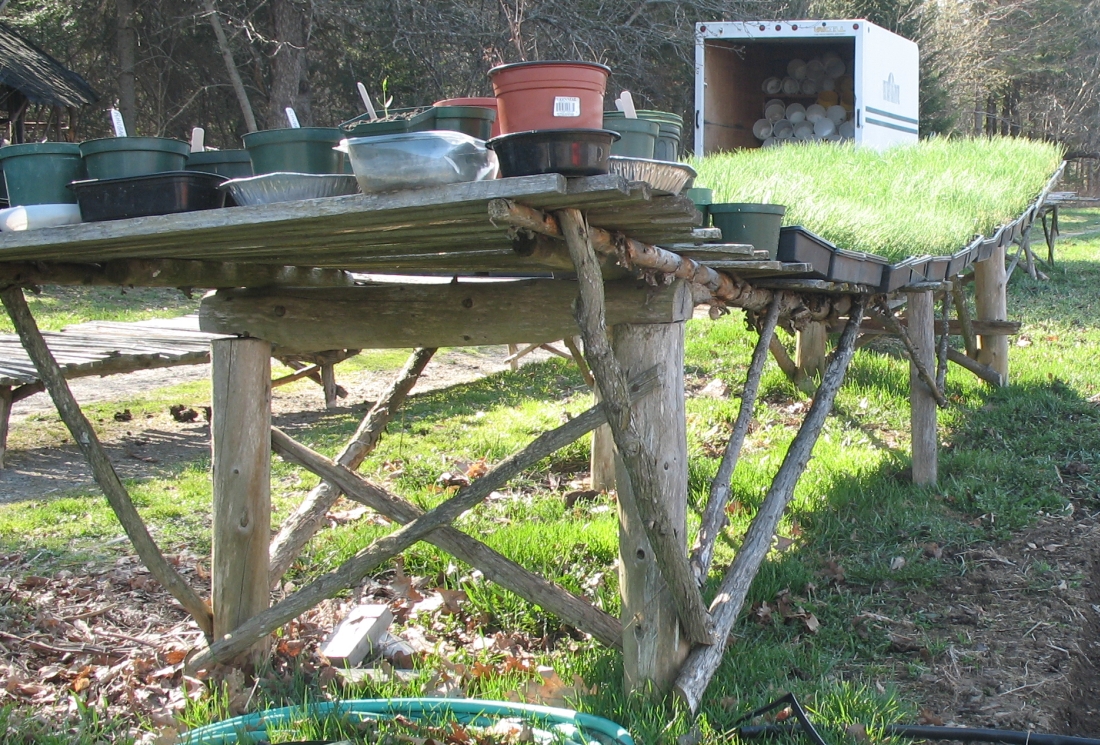
Farm tables are useful.
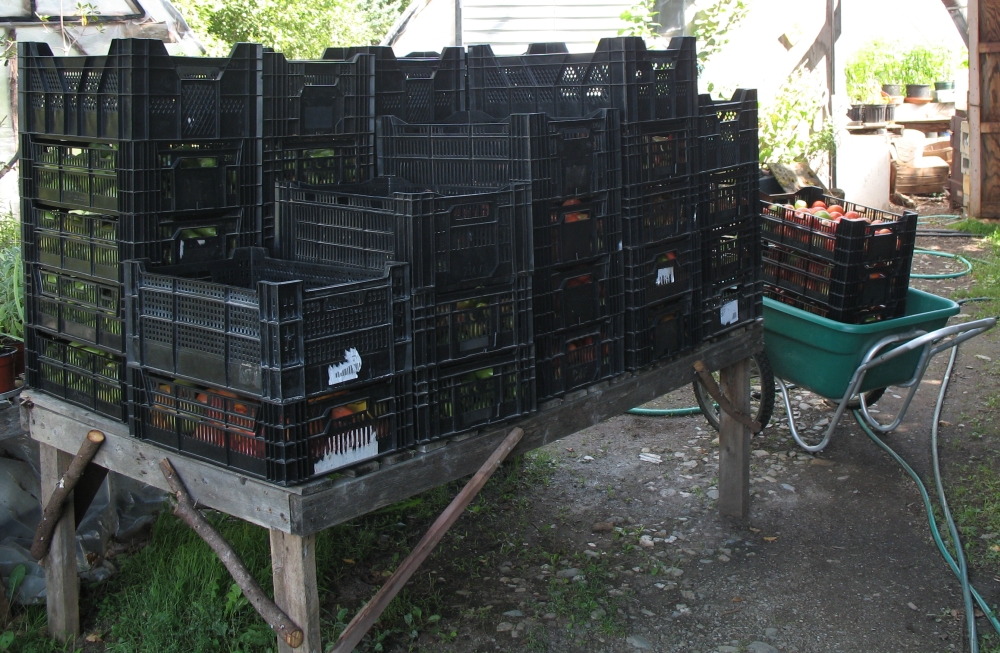
A farm table is a place where you put pots and trays of plants and  seedlings to keep them off the ground, away from mice and slugs and peeing dogs. It's where you pile onions and squash for curing and your seed potatoes for sprouting. It's where you stack your crates of tomatoes for ripening. Add a table cloth, and it's where you provide refreshments during a farm tour. And you'll need more than one farm table, perhaps a half dozen or more. You'll want them to be strong, but they must also be cheap to produce, long lasting, rugged, and easy to repair. seedlings to keep them off the ground, away from mice and slugs and peeing dogs. It's where you pile onions and squash for curing and your seed potatoes for sprouting. It's where you stack your crates of tomatoes for ripening. Add a table cloth, and it's where you provide refreshments during a farm tour. And you'll need more than one farm table, perhaps a half dozen or more. You'll want them to be strong, but they must also be cheap to produce, long lasting, rugged, and easy to repair.
 Many tables I have seen are made from dimension lumber, which can get rather expensive even for a flimsy table, and unless it is cedar or pressure-treated, will last only a few years when kept outdoors year-round. However if you have access to a woodlot with some young spruce or cedar, then you can easily cut poles to make the framework for some very robust and sturdy tables by using only a chainsaw for felling trees and cutting poles to length and a machete for smoothing the poles wherever necessary. These tools, plus a good 18v cordless drill and a collection of screws are all the equipment that is required.
Almost all of our farm tables spend their entire life outdoors. Even when they are used in the greenhouse, they are daily getting watered along with the plants. What we describe here are tables we have developed that will last a good five to ten years in an outdoor environment, and they will be easily reparable as one or more of their segments succumbs to decay.
We learned from years of mistakes.
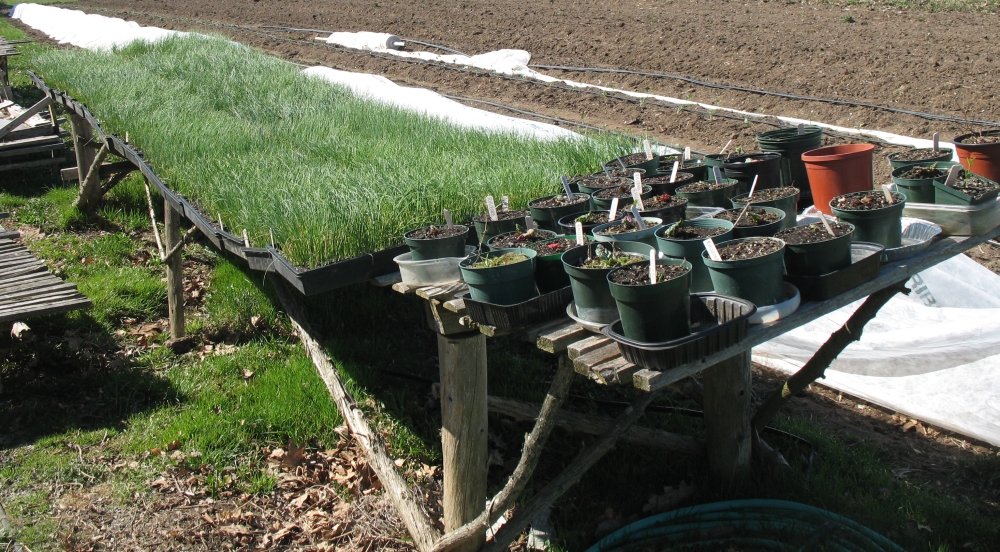
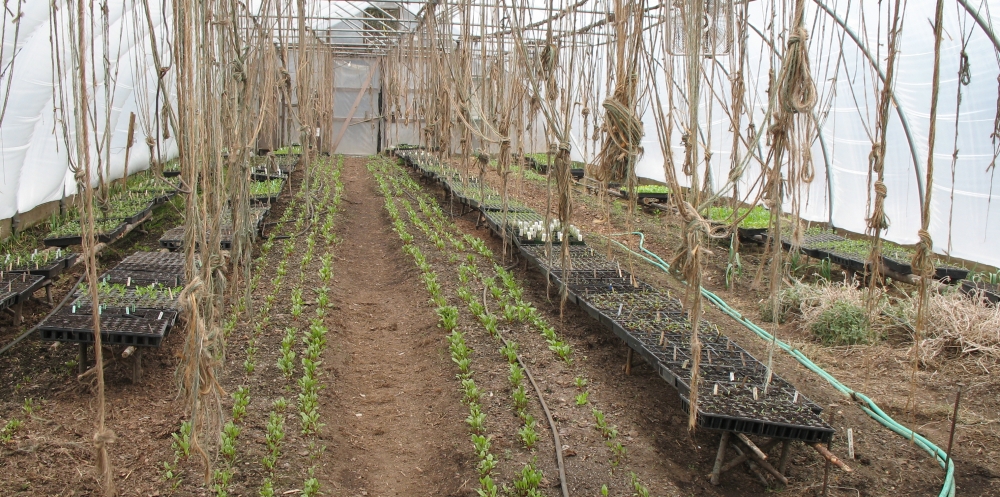
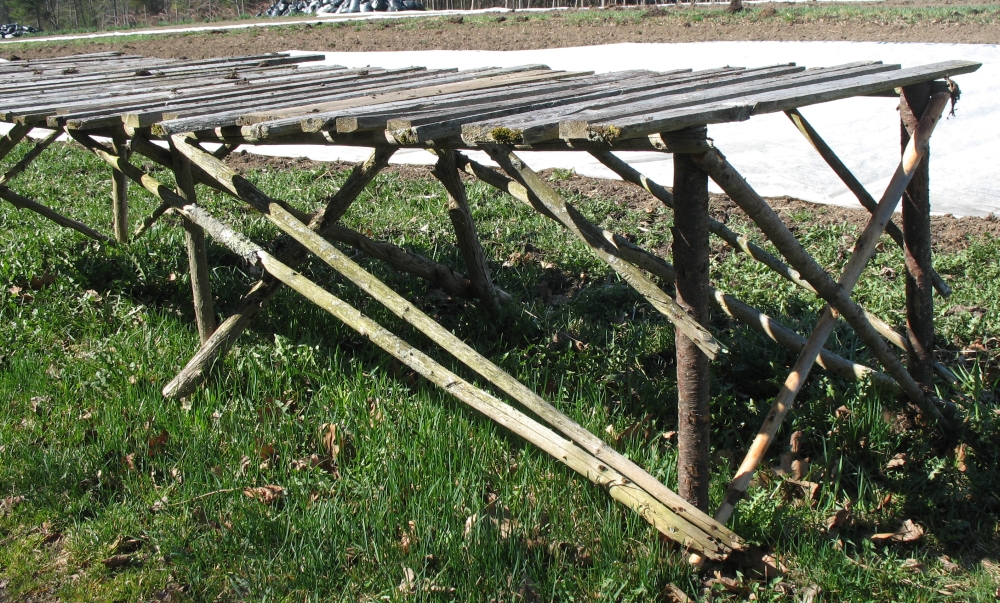
 We began by making long narrow tables (18” wide by 10‘ to 20‘ long) that would fit between the in-ground growing beds in the greenhouse and would accommodate scores of trays of tender seedlings. These were low simple structures intended to keep mice and slugs away from the seedlings, and had just two long wooden rails for the top, across which the pro-trays of seedlings were placed. Basically, they were just a table frame. We are still using these and each year several need repair work, or even occasional replacing when one is disassembled for retirement to the firewood pile.
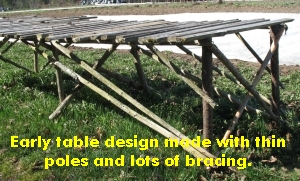 For a while, we kept using that light duty design to make larger tables for outdoor use outside the greenhouse. But after a few years, we discovered that the tables began to show rot and the smaller 1” to 2” poles we used were beginning to break. Also we observed that although recycled lumber made inexpensive table tops, cedar slats would have a life of two or three times that of spruce lumber. However, the difficulty we have in harvesting sufficient cedar has caused us to continue using spruce in many of our tables. Eventually, we hope to use exclusively cedar, Northern White Cedar in our case.
Construction is essentially the same for either wood, but you have to take into account that cedar is not as stiff a wood as spruce, so some parts of the table need to be of stouter construction when made of cedar. However, cedar is easier to cut and to drive screws into than spruce is, and is less “sappy” when being used green, straight from the woods.
Nails vs screws.
Screws have an advantage over nails in both in the construction and in the repair of a farm table and in its deconstruction at the end of its usable life. Nails are about a third the purchase price of Phillips head screws, and torx screws are even more expensive, currently about $28 for 5 lbs. However I have almost completely abandoned using nails in my table making, after realizing how difficult it is to repair a nailed together table when compared to a screwed together table. Also, the pounding required when driving nails during construction or repair means many connections are quite difficult to make; screwing pieces together is always a simpler and gentler experience.
Sizes of screws.
We use 2”, 2½”, and 3” Phillips screws for some of the bracing and for attaching the top slats. Due to the tendency to strip a Phillips head when driving a screw longer than 3”, we use torx (or star-bit) screws of 3” , 4” and 6” in length for the larger pieces of the table frame. The size screw we choose depends upon the size of the poles being used. A screw should always penetrate the second piece by at least half the screw's length, but more is better, altho coming out the other side is a waste and creates nasty snags for clothing and hands.
Size of framework pieces.
We have come to the conclusion that stout legs are good legs. Not only are they strong, but they take longer to decay. We use four pieces three to five inches in diameter and 26 inches long, for the legs of each table. Bracing can be smaller, from 1½” to 2½” in diameter. The top rails that define the length of the table need to be stiff and fairly straight, otherwise your table top may sag and will be irregular—meaning your pots will tip over and your crates will wobble.
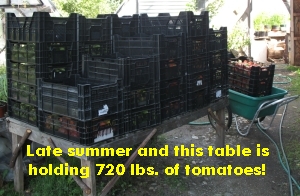
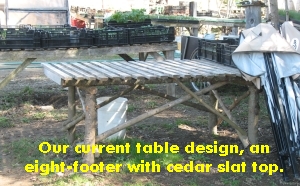
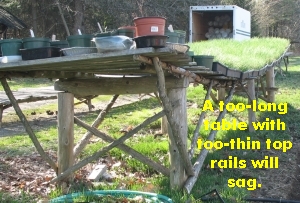 We have made several tables over twenty feet in length, but have found that it is very hard to keep them from sagging when weighted down with several hundred pounds of just-watered seedlings or crates of ripening tomatoes or curing squash. It also takes two people to maneuver them to a new location. We have come to the conclusion that a table about eight feet long, which can be wrestled into any location by one person, is a better all-around size and allows for more flexibility in the layout of the tables.
Length of legs.
We have found that a table top height of 30 inches suits everyone at the farm and is just the right height for moving plants and trays without having to do too much bending. This means that, subtracting for the width of the two cross pieces that will sit atop the legs, each leg should be around 24 inches long.
Table tops.
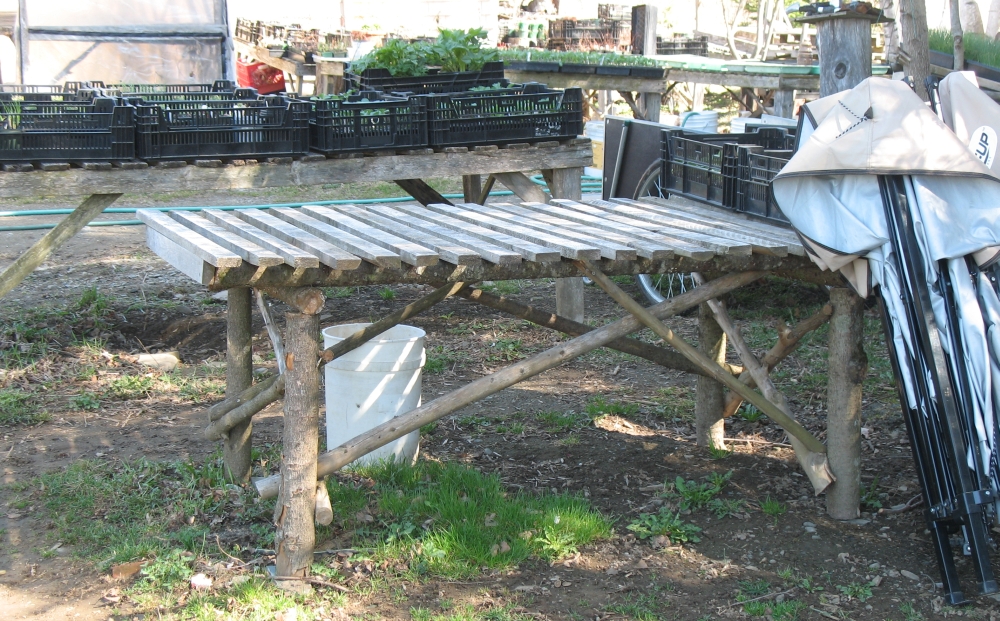
Our favorite top by far has been the cedar fence slat seconds that we purchased from a cedar fence company. We bought a four foot round bale each of 3', 4' and mixed 5' and 6' slats. The four footers have become a favorite for the table top width. When screwing these to the table frame, it is important to sink the screws slightly into the cedar so that the screw heads won't be forever catching on your seedling trays as you slide them around the table. If you are using a soft wood like cedar, making countersunk holes won't be necessary.
We have also played with using heavy duty vinyl covered fencing sold to be used for greenhouse tables. These are workable and make a lighter table, but I still prefer cedar slats.
Set legs on flat rocks.
To preserve the legs, which are otherwise in constant contact with the moist ground, we set all of our table legs on flat rocks or bricks. Wood blocks don't work as well, as they will wick moisture from the ground to the leg, and they themselves will rot producing a wobble in your table.
Constructing the table.
 Parts List for an eight foot long by four foot wide table:
- Four Legs: 4”-6” in diameter by 24”-28” long.
- Two Leg Tops: 2”-4” in diameter by 36” long.
- Two Top Rails: 2”-5” in diameter by about 8' long.
- Four braces for End Units: 2”-4” in diameter by 4' long.
- Four braces for Top Rails: 2”-4” in diameter by 5' long.
- Twelve 6” torx screws.
- Thirty Two 3” or 4” torx screws.
- Forty slats 1“ x 2&ldquo x 4' (if using slats for the table top).
- Eighty 2” Phillips head screws (if using slats for the table top).
- Saw
- Drill
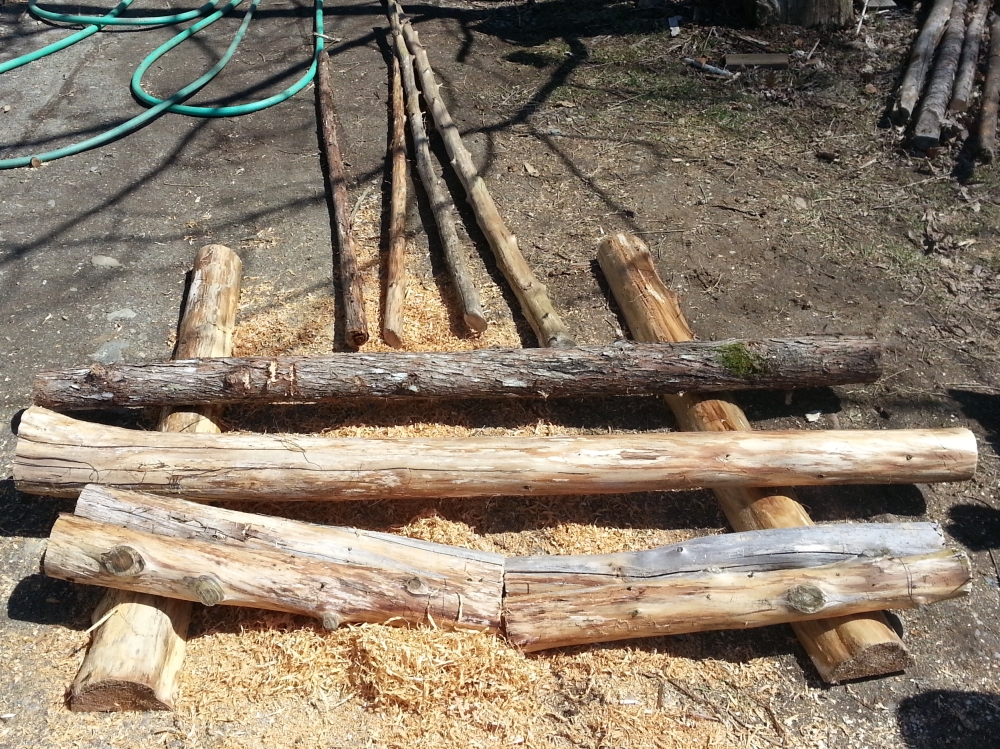
Initial Cuts.
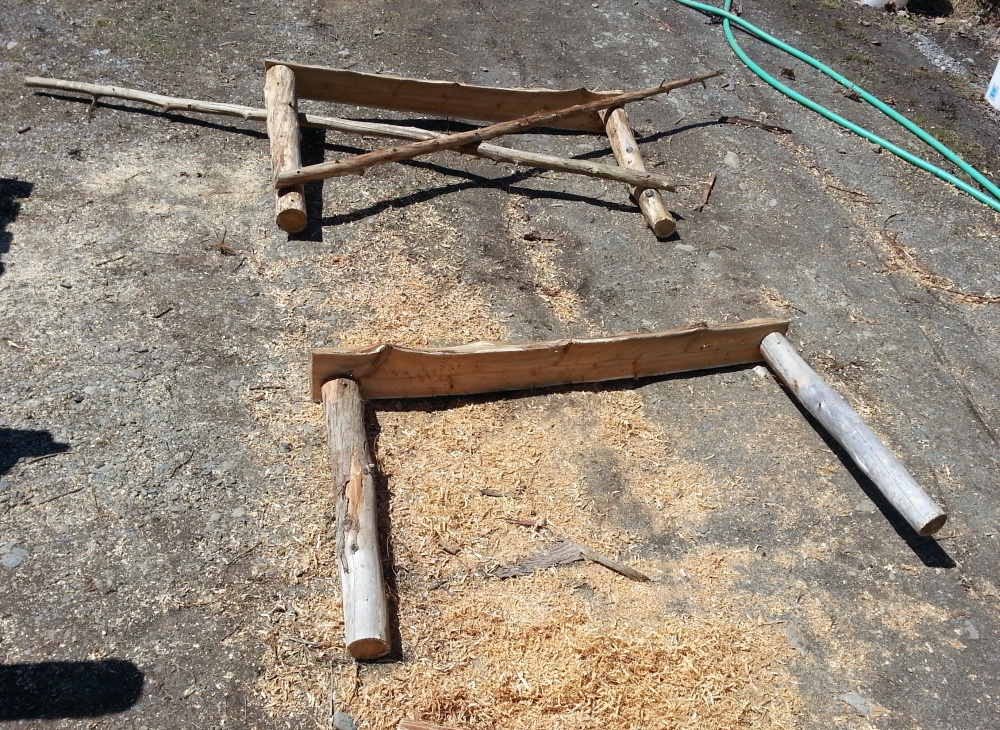
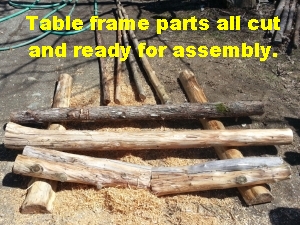 Begin by cutting stout 4”-6” diameter poles for all four legs to the same length, probably 24” to 28” long. There will be two more poles that are to be set on top of the legs, so don't make the legs too long to begin with. Then cut two slightly thinner poles around 4” in diameter to 36” long. These will be your two top pieces connecting the tops of the two legs on each end. In photo at right, a large log was ripped in half for this (the logs on the ground), and these are 52” long because this particular table was going to be 6 feet wide.
End Units.
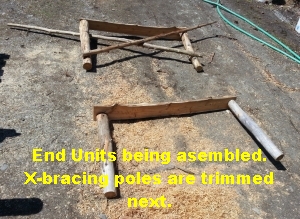 Your table will have four legs, but each end unit—consisting of a pair of legs, the top piece connecting them, and X-bracing—will be constructed separately. Start by constructing an end unit that will provide two legs at one end of the table. Lay two of the legs on the ground about 36 inches apart, and screw a 4” diameter 36” inch long pole to the end of both legs, connecting them. Make sure the legs are roughly parallel before driving the screws home. This will produce a U-shaped structure, where the open end will be on the ground once the table is finished.
Bracing the end units.
 Then find two thinner poles about 4 feet in length for the bracing. Screw these to the legs starting about 3 or 4 inches from the leg bottoms and connecting neat the top of the other leg, so they make an “X”. Don't worry about overhang at this point; saw overhangs off later. Screw one brace on the top, flip over the structure, and screw down the other one. Clever placement of these braces on one side fo the leg or the other will allow you to also screw them together at the center of the “X” for additional strength. Use two screws in each spot.
Make another end unit.
You now should have a very strong set of legs for one end of the table. Repeat the End Units step (above) to produce another set of legs for the other end of the table. Once you have both sets done, use your saw to trim any overhang of the braces, being careful not to hit any screw heads. If your leg ends were cut square and your ground fairly level, each End Unit will be able to stand by itself.
Top Rails.
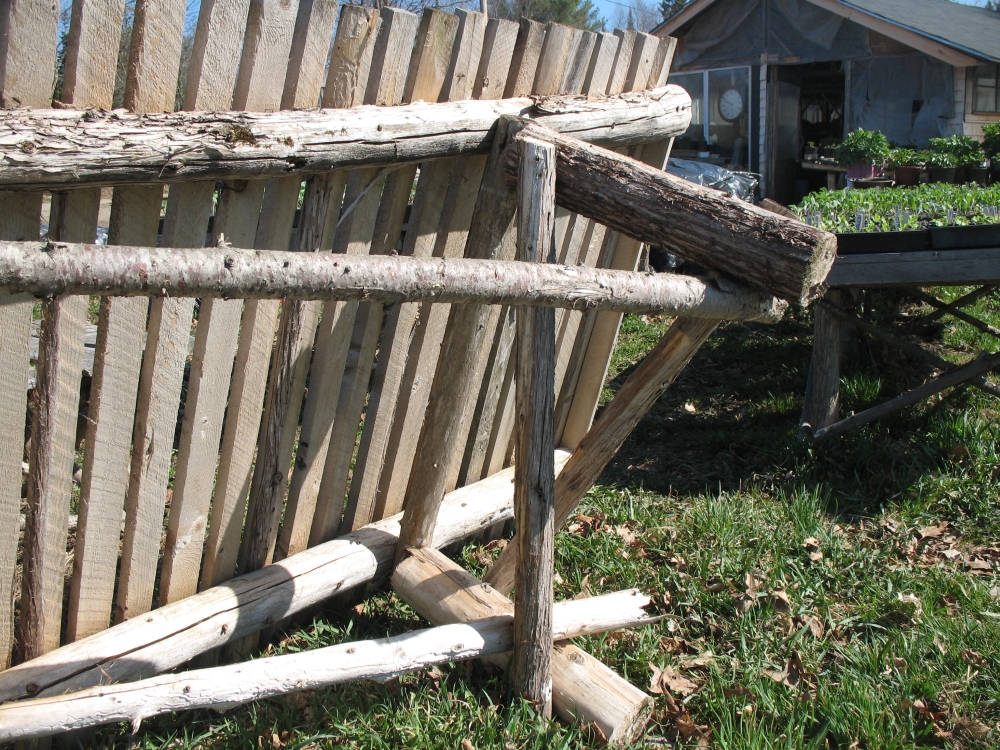
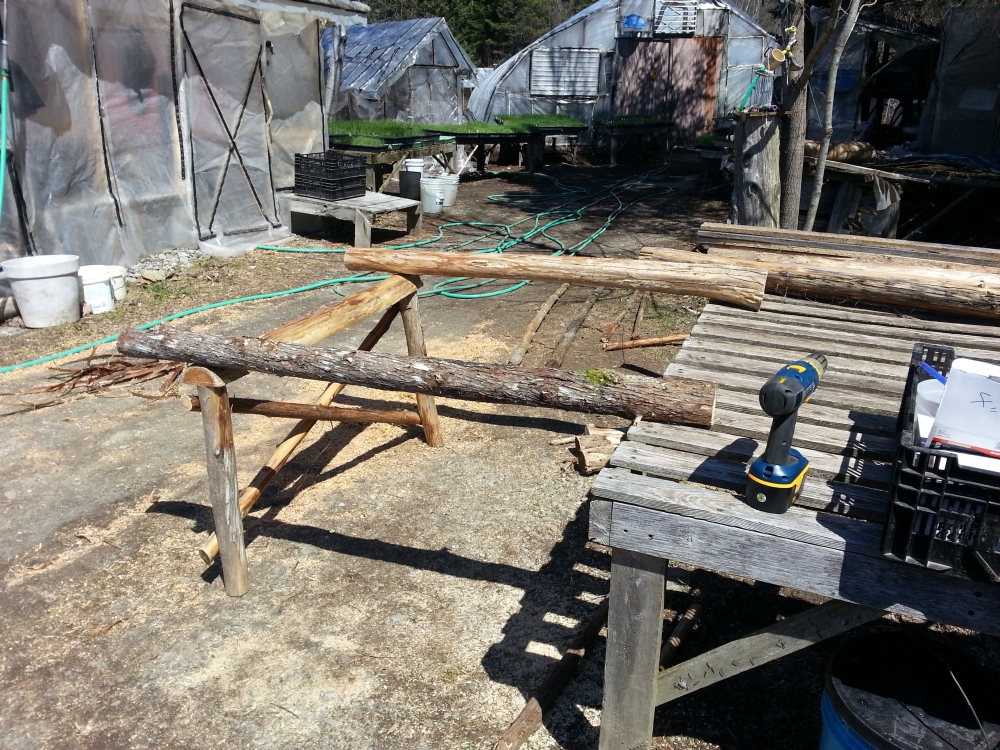
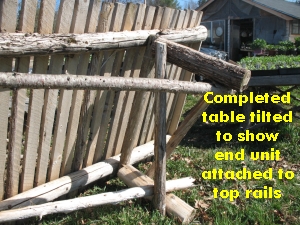
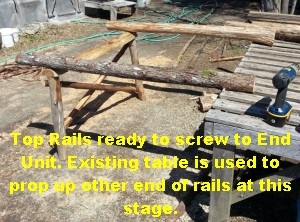 Now is the time you decide on the length of your table. As stated above, my favorite length is around eight feet because it makes a table that is more easily movable and has less tendency to sag under weight, and at various times these tables may be supporting several hundred pounds. Following this advice, locate two poles about eight feet in length. These will be your table's top rails. At this point it is easier if you have something to support these rails at the opposite end from where you are working, perhaps a saw horse or another table. Set one end unit in about a foot from the ends of each of the top rails, so the top rails will overhang the end unit by a foot. (An overhang of too much more than a foot may result in the table tipping up if a great weight is placed right on the end.) This is where you use your biggest screws to attach the top rails to the end units. Screw the rails so they are directly over the legs, using three or four 6” torx screws to attach each top rail.
Brace End Unit to Top rails.
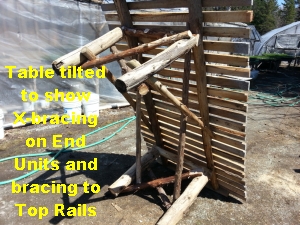 At this point the only thing maintaining the 90 degree angle between the top rail and the end unit is the stiffness of the screws, so it is time for bracing. Select two light poles, 2” to 3” in diameter and four or five feet long and screw these to the leg (attach them about 4” up from the bottom of the leg) and to the top rail. Put one on each side. They can attach to either the inside or the outside of the top rail. Use two screws in each spot, and just before driving the first screw home, be sure that the angle between the end unit and the top rails is close to 90 degrees.
 Once the top rails are braced to the first End Unit, you can pick the table up and set the other end of the top rails onto the other End Unit and repeat the process of attaching and bracing. Then saw off any overhang from the braces, remembering that the bracing should not protrude above the top rail at all or it will make attaching a top to the table far more difficult.
You now have a table frame that will accept almost any kind of top and sturdy enought to support several hundred pounds of weight. The table is strong enough that it may be dragged (or even rolled!) to any other location.
Adding a Top.
Since your top rails are 36“ apart, using 4‘ slats, lumber or vinyl covered fencing allows a 6“ overhang on each side. If using slats, use a half inch spacer stick between them as you screw them down.
If this article inspires you to make a table, I'd be delighted if you could take some photos of it and send them to me.
|
![[Snakeroot Organic Farm logo]](pix/sof.gif)